
Using the app
The window
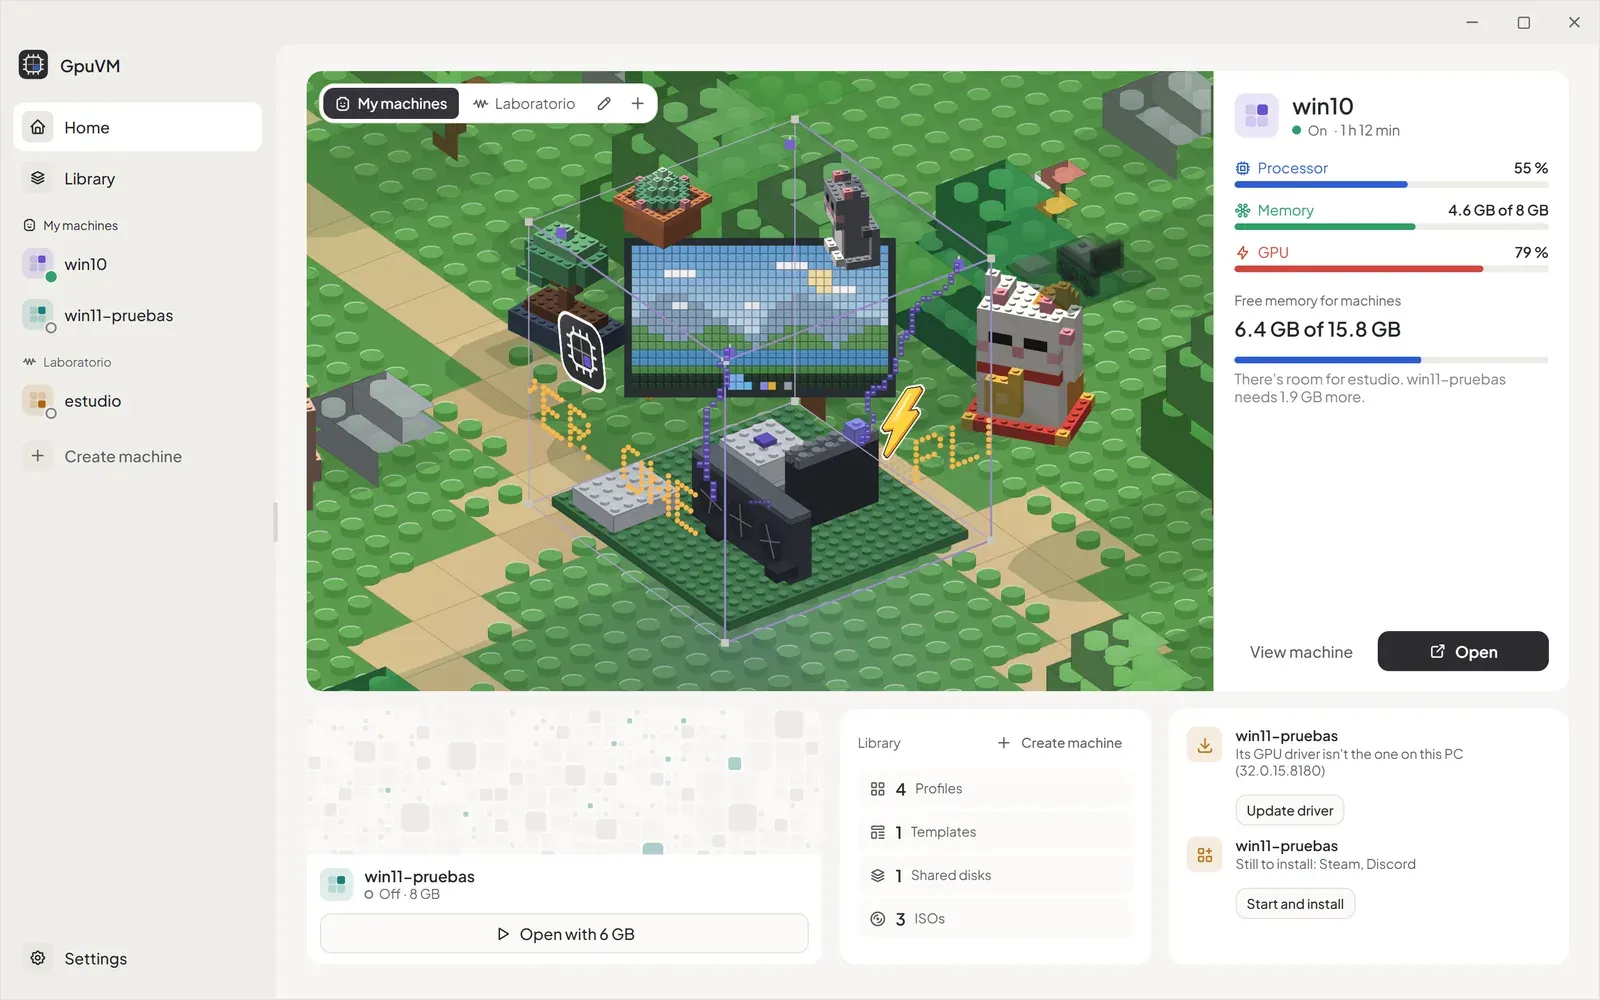
Section titled “The window”- Sidebar: Home and Library at the top, then every Hyper-V VM on the PC (created with GpuVM or not) under the space it belongs to, and Create machine at the end. Settings sits at the foot. Each machine shows its state as a dot on its icon and, on the right, what the dot doesn’t say: a tiny chart of its last minute (processor, memory and GPU in their colors) while it runs, or the step of a job in progress.
- Resize or fold it: drag the line on its edge to change its width; click the line, or drag it narrow, to fold it.
- Reorder by dragging: drag a machine to another place, in its space or in another one. The others make room as it passes and it shows faded where it would land. Spaces are reordered the same way, by dragging their name.
GpuVM opens without administrator rights; the GpuVM Windows service does the Hyper-V work for it. If the service is stopped and set to Manual, the app says so with Start service. If the service is missing, it says so with Repair, which registers it again after a UAC prompt. Deleting a machine, a disk, a shared disk or a template asks for a UAC confirmation first; if you say no, nothing is deleted. If Hyper-V can’t be read, a notice shows the error with Retry.
The interface is in English and Spanish: it follows Windows’ display language, or the one chosen in Settings.
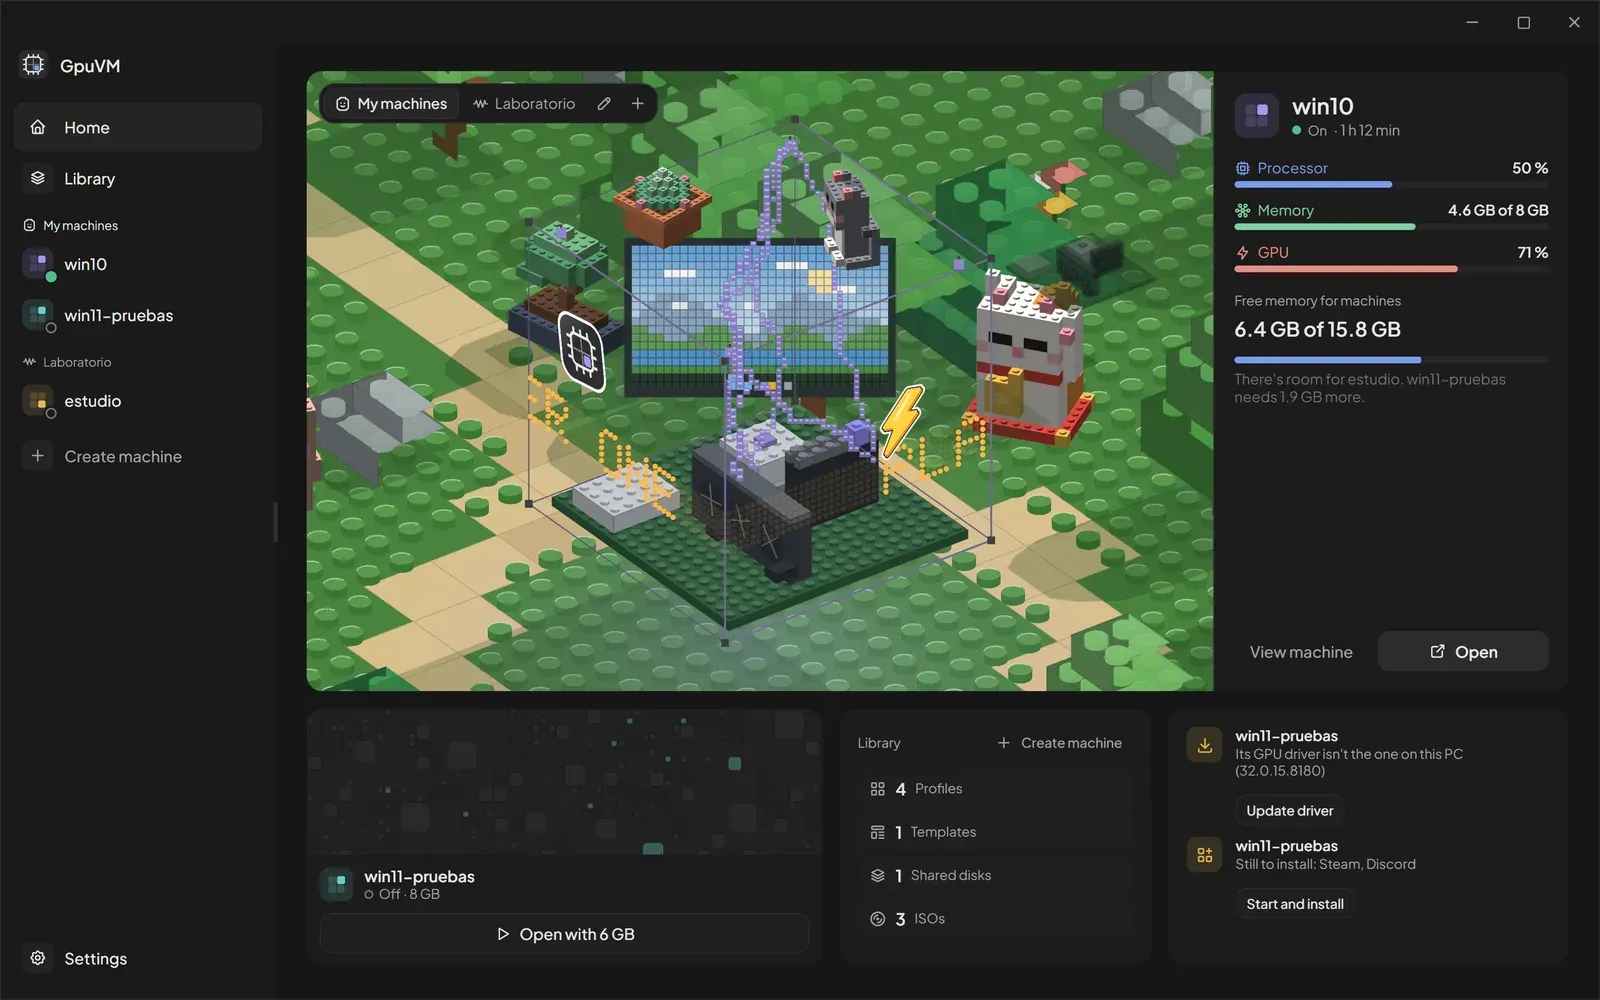
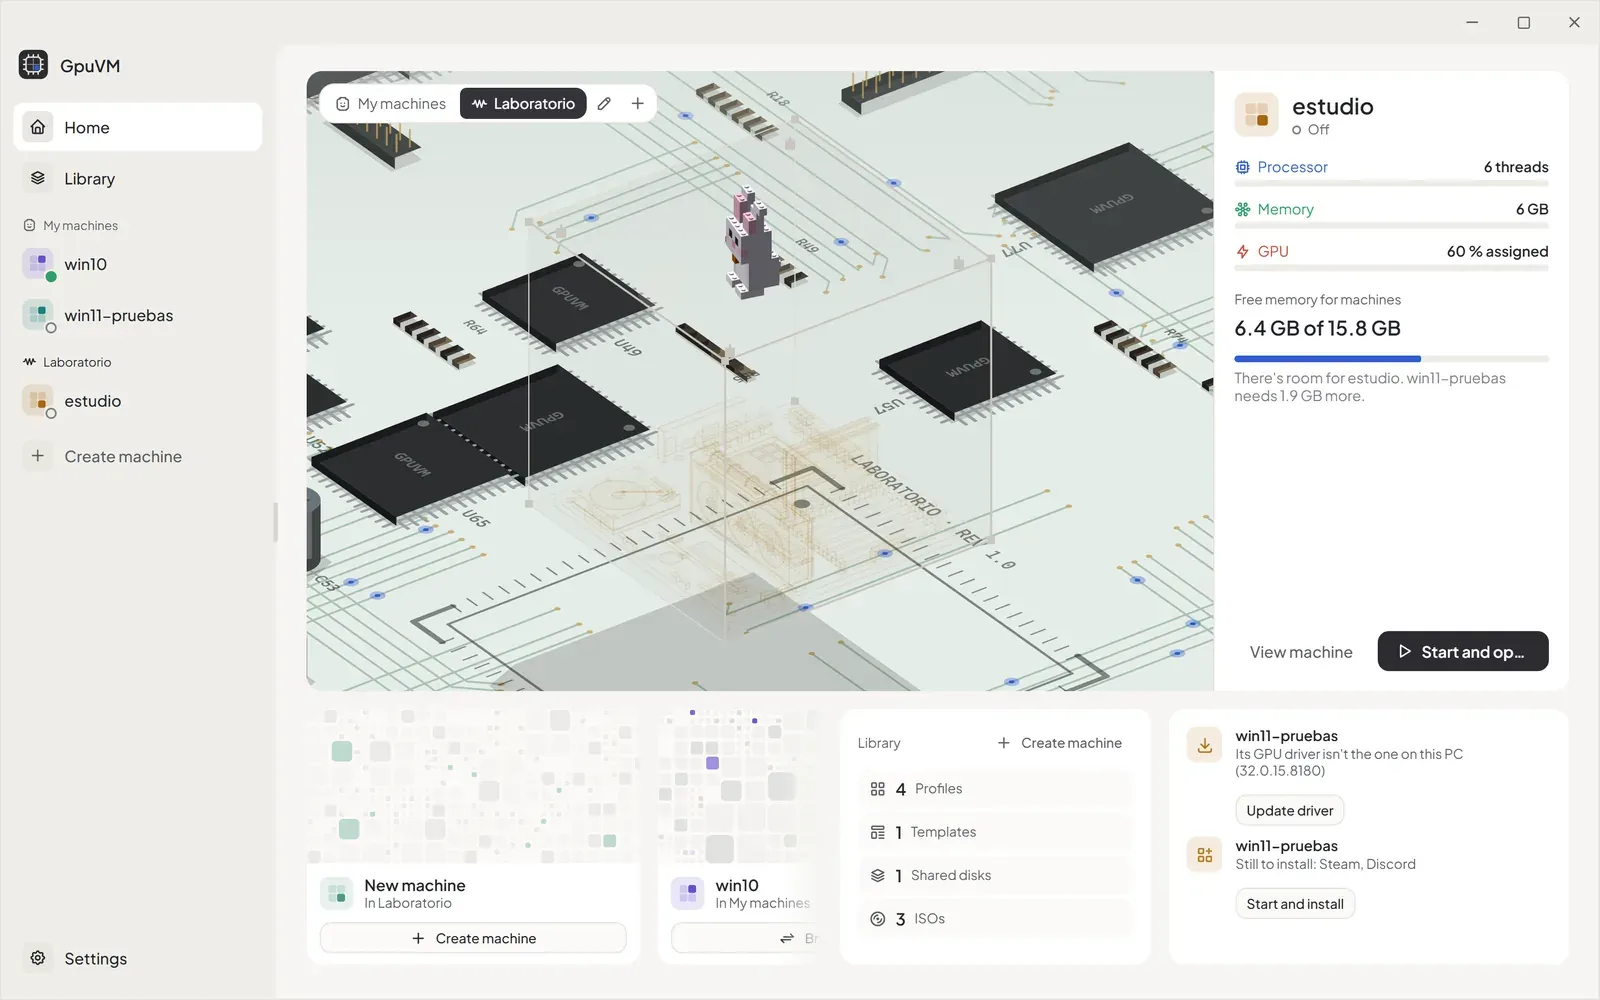
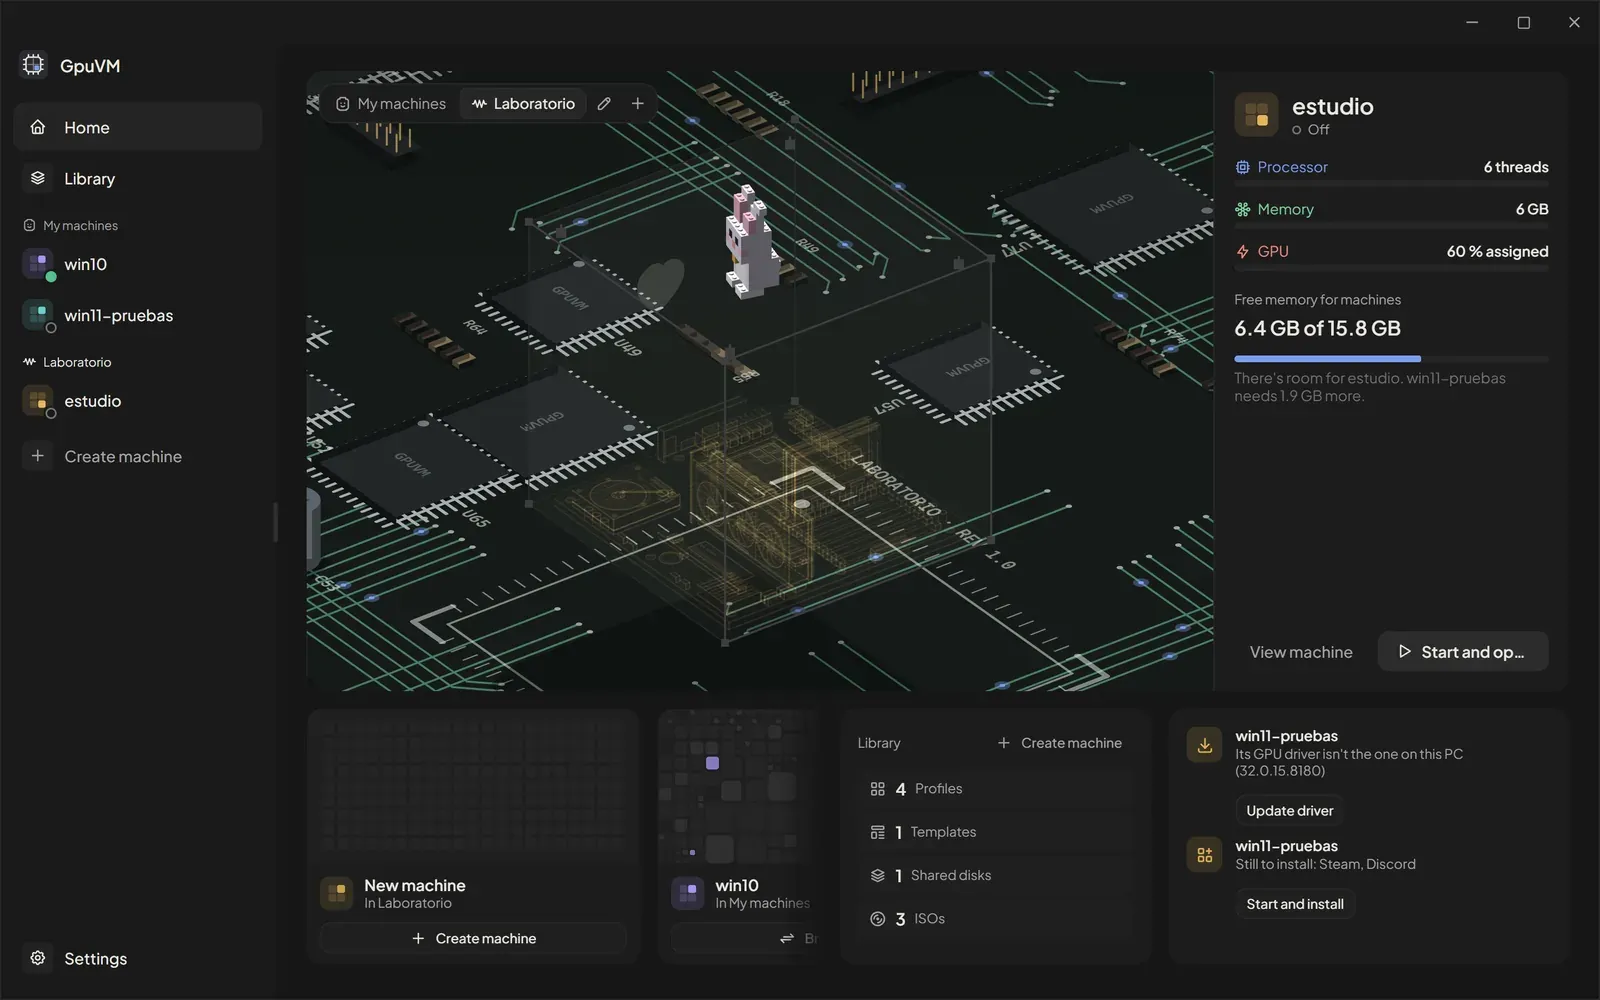
The app opens on Home, which fits the window without scrolling:
- The stage: the machine in use (or the last one opened) inside its cube, with the other machines of the space beside it, on the space’s world. Drag to turn it, scroll to zoom.
- Beside the stage: that machine’s processor, memory and GPU use, Free memory for machines (how much the PC has free and which machines fit), View machine and its main action (Open, Start and open…). A machine that doesn’t fit offers to open with the memory that does fit, for example Open with 6 GB: it lowers its memory to what fits (saved, like changing it on its page) and opens it.
- Below: every other machine of the space with its action (the row scrolls sideways, also by dragging it), the Library at a glance (how many profiles, templates, shared disks and ISOs) with Create machine, and what needs attention, only when there is something: a GPU driver out of date, Moonlight not paired, apps waiting to be installed, the Windows password missing or little disk space left, each with the button that fixes it.
Drag the lines between these parts to resize them (double-click one to reset it); the sizes are remembered.
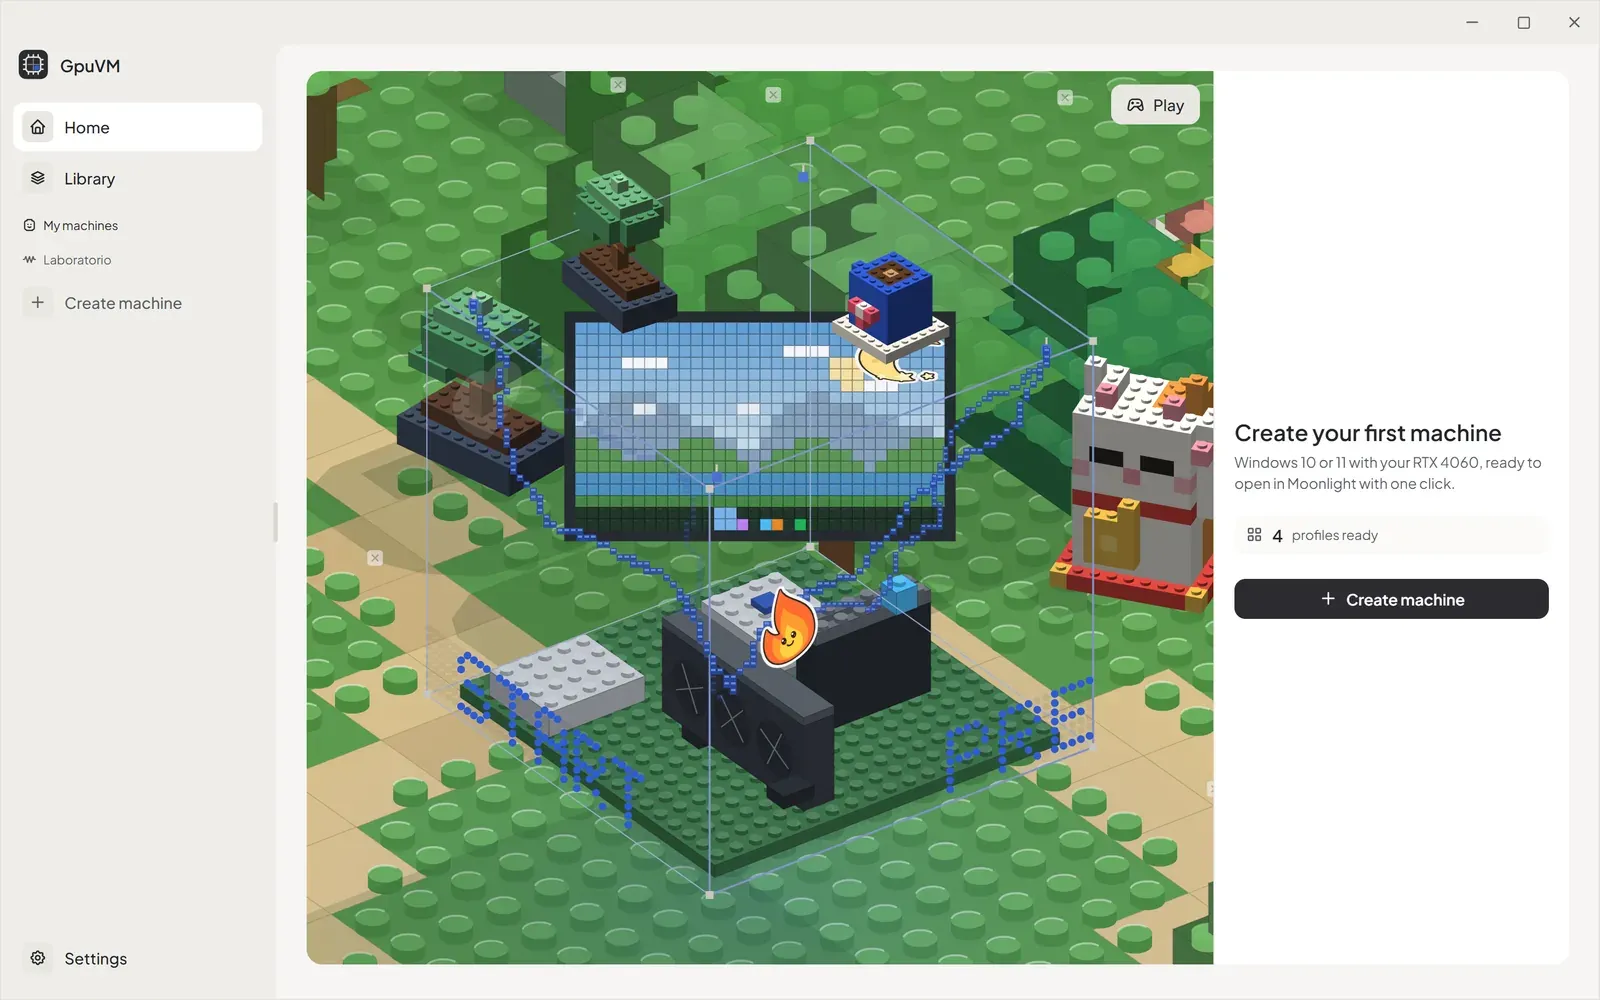
With no machines yet, Home shows an empty machine in the cube with what the Library already has ready and Create machine.
Spaces
Section titled “Spaces”A space groups machines by what they are for (work, games, AI tests…). Home shows one space at a time, picked from the tabs over the stage (they scroll with the wheel); the sidebar lists the machines under their space. The first space is My machines.
- New space (the + after the tabs) and the pencil next to them (to edit the space shown) open the same dialog: Name, Ambient, Time of day and the Machines in it. Delete space sends its machines back to another space.
- Ambient is the world drawn around the cubes: Motherboard (chips, capacitors, connectors and traces with data running in the accent color, with the space’s and machine’s names printed on the board), Blocks (a baseplate of studs with paths, a pond, trees, houses and brick figures, by Day, Evening, Night or By the clock) or Studio (the app’s plain gray). The world turns and zooms with the cube, has a light that shades every piece and casts shadows, and the hologram lights the floor under each machine.
- A new machine goes into the space it is created from. A machine moves to another space from its Customize section, or by dragging it from the sidebar or from Home’s cards onto another space.
- A space with no machines offers a New machine card and the machines of other spaces, with Bring here.
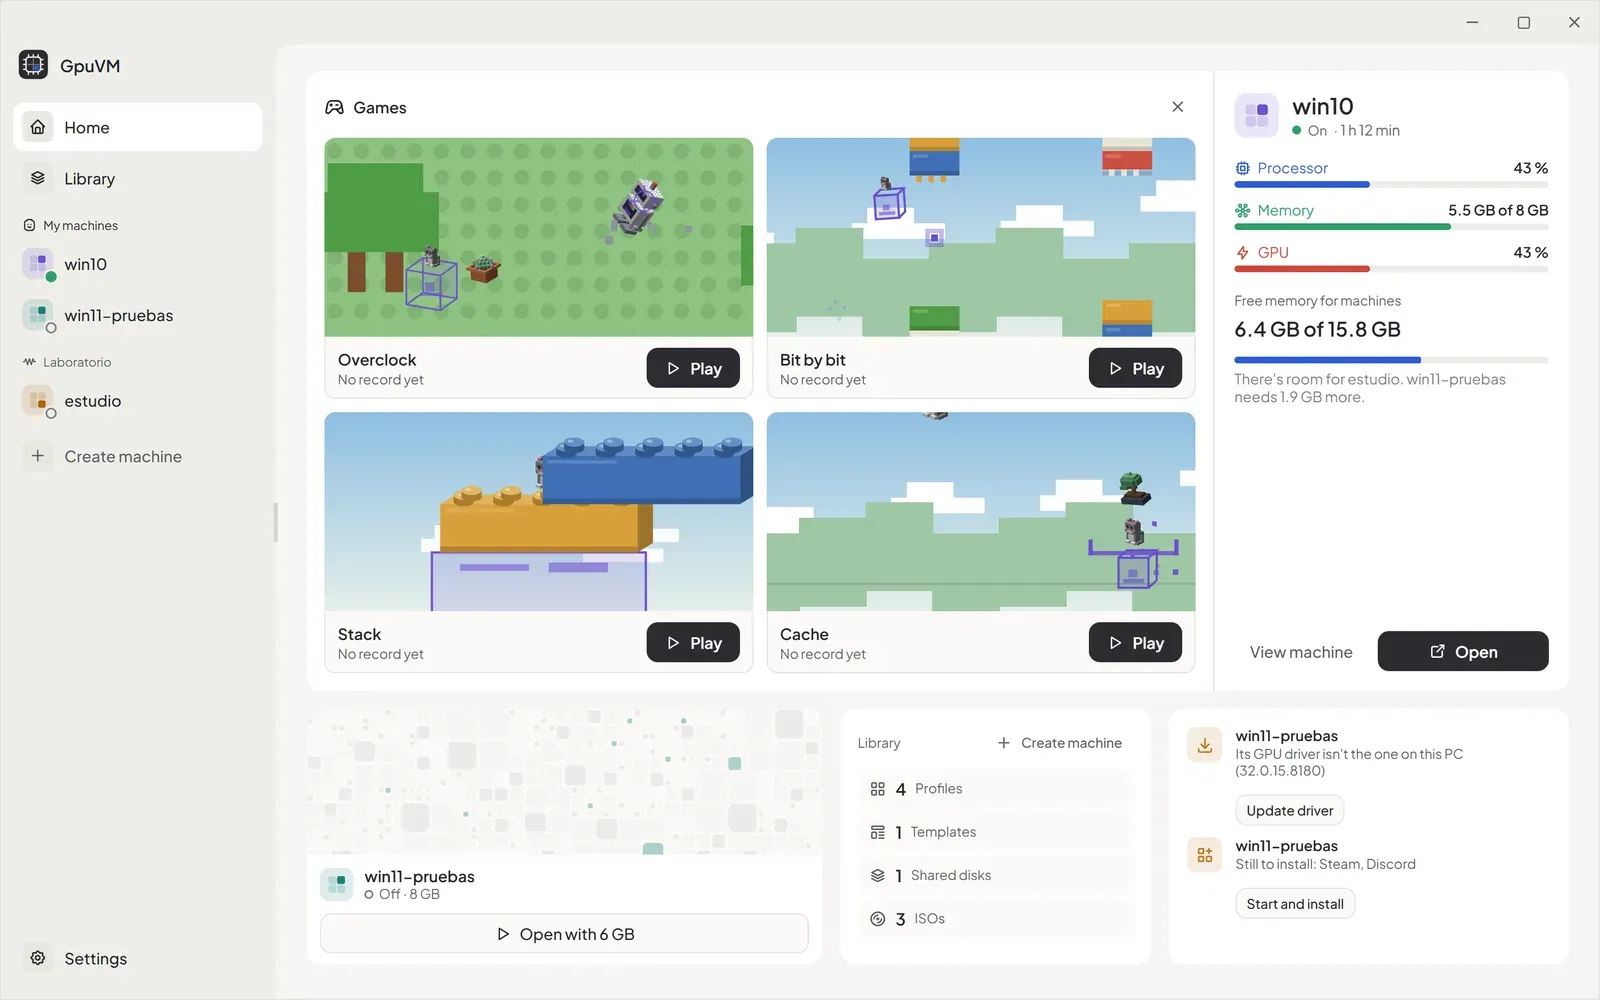
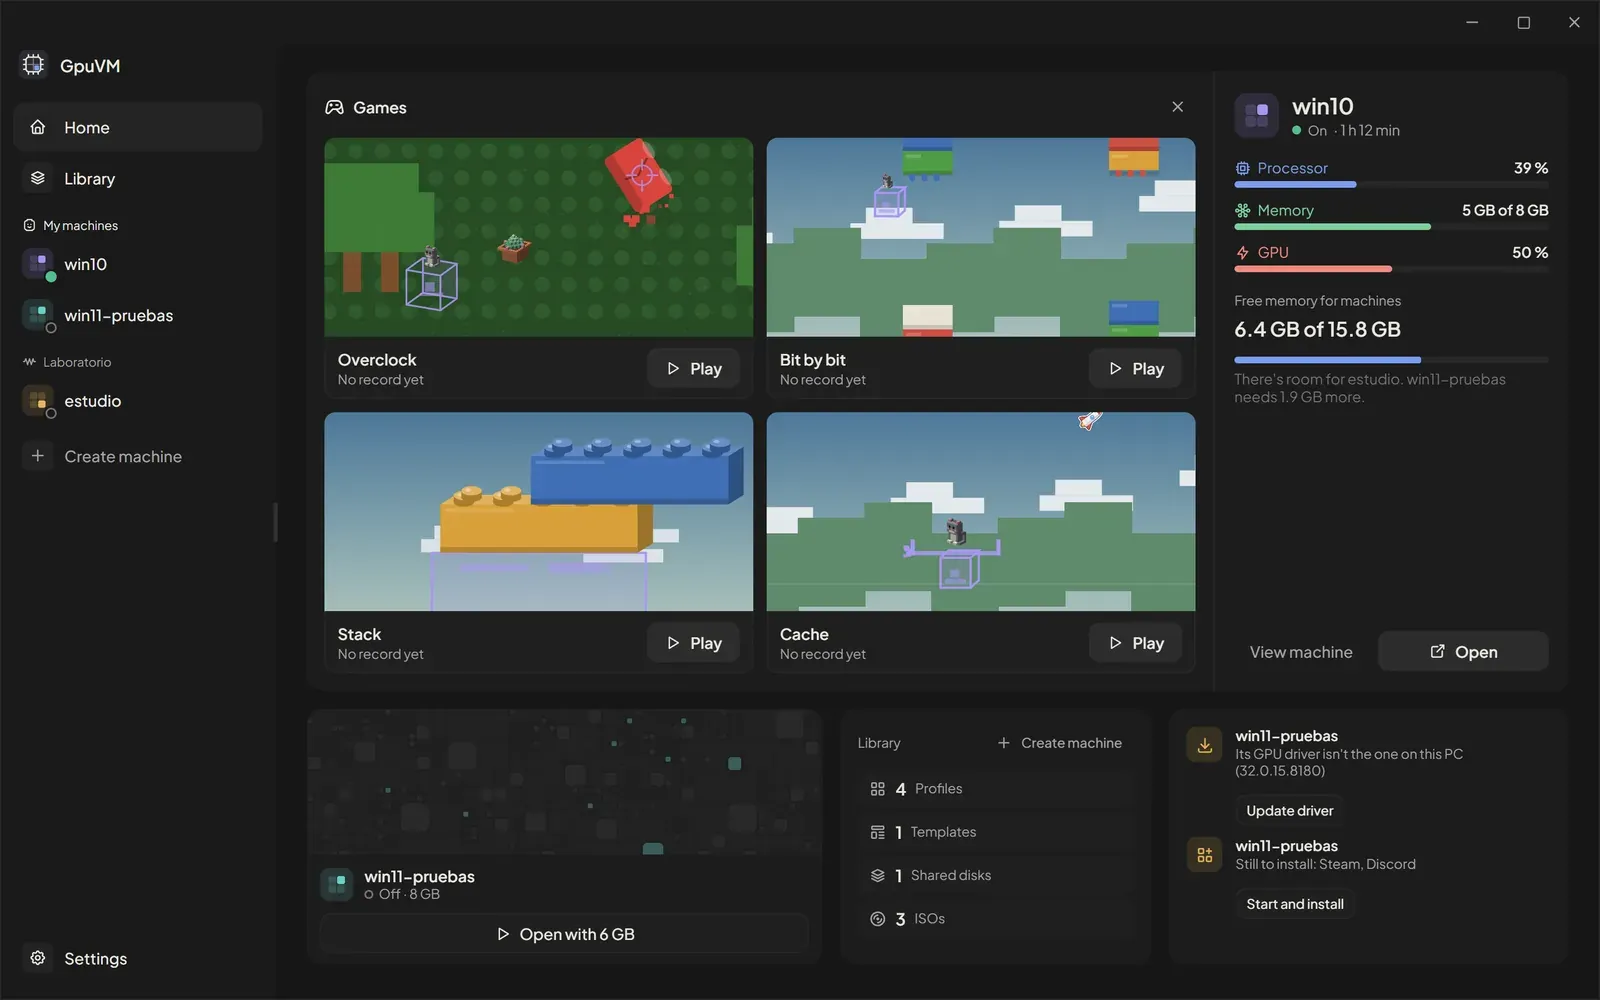
Play, over Home’s stage when you point at it, opens a gallery of games. Each card shows the game playing on its own, with your best score. Before playing, a screen shows the game with the machine and mode you pick, its controls drawn as keys and mouse buttons, a few tips and your record.
- Overclock: your machine flies through bricks and rival machines. Move with W A S D, aim with the mouse, shoot with the left button or Space, and use the ability with the right button or E; P pauses. Stickers bring weapons, a shield or a life; taking things down fills a frenzy where your figures come out huge. Every 40 seconds you cross into another zone (the studio, a motherboard, a world of blocks). Modes: Solo, or Team, where your other machines fly with you and shoot on their own against more and tougher rivals (it needs at least two machines).
- Bit by bit: your machine jumps through the gaps between columns (left button, Space or ↑), in the Studio, on a Motherboard or among Blocks. Every gap scores, bits count double, and the gaps narrow as your score grows.
- Stack: a block slides over the tower and one click (or Space or ↓) drops it; what hangs over falls off and the tower narrows. Right on top is a Perfect, worth double, and three in a row grow the block back. Your machine is the base and its figure rides the top. Every 8 floors the tower climbs into another world (blocks, a motherboard, the studio, then space) and it gets harder.
- Cache: brick figures rain down; move your machine along the floor with the mouse (or A / D) to catch them. Each one that reaches the floor costs a heart. Golden ones are worth five, spiders cost a heart if you catch them, and stickers bring a clone that catches beside you, a wider catcher, slow time, a magnet, a shield or a heart.
Each game and mode keeps its best score.
Create a machine
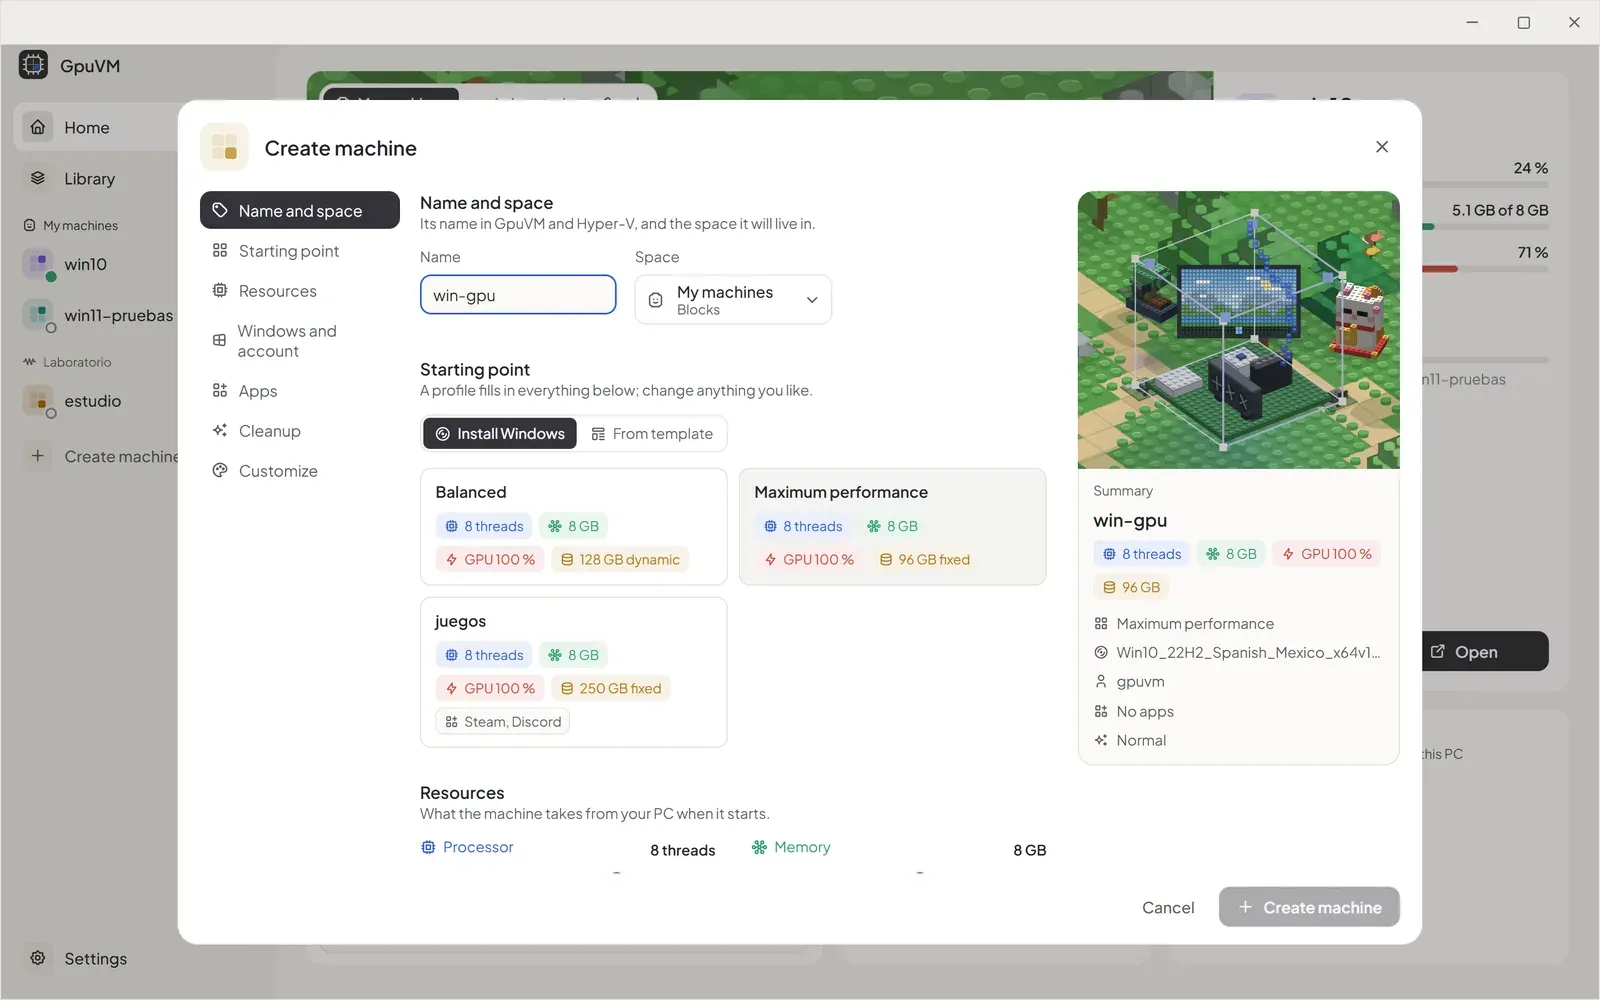
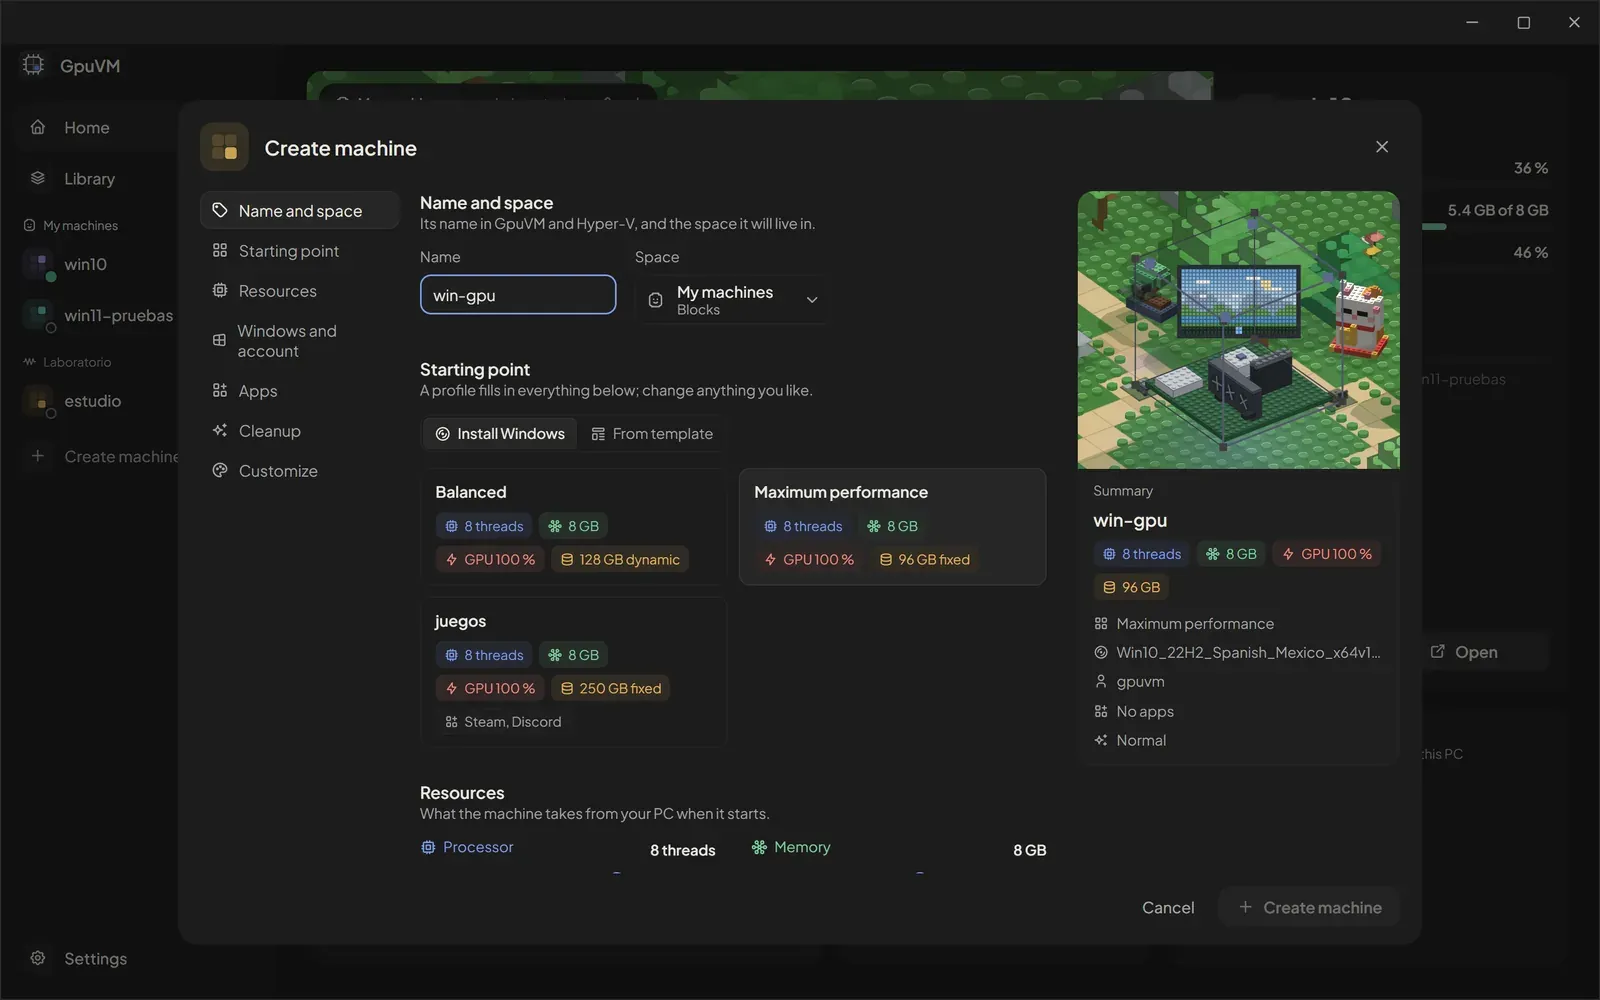
Section titled “Create a machine”Create machine (in the sidebar, on Home or from a profile in the Library) opens one large dialog: its sections on the left, a summary always in view on the right, and the cube beside it, built as you choose.
-
Name and space: letters, numbers,
_or hyphens, up to 40 characters, no spaces (it suggestswin-gpu), and the space it goes into. While you type the name, the camera goes to the board’s serial plate and engraves it letter by letter. -
Starting point: Install Windows or From template (when you have templates), and a profile: Balanced (
balanced), Maximum performance (max-performance, the default) or one of your own. The profile fills in everything below, including its ISO, apps and use; see Profiles. From a template the machine is ready in seconds and only needs the name; Windows, its apps, cleanup level and password come from the template. -
Resources: threads, memory, GPU share and disk. The disk stops at what fits on the drive once every machine’s disk there is full, keeping 20 GB for Windows.
-
Windows and account: the Windows image (the ISOs you already used or added first, then the ones in your Downloads and Desktop folders, or Find another ISO), the User (
gpuvmby default; up to 20 letters, numbers, dots or hyphens, names Windows reserves are rejected) and the Password, at least 6 characters, typed twice. -
Apps, installed the first time the machine opens (Apps); Cleanup, how clean Windows is (Windows cleanup); and Customize, its decoration (Customize), with Random look to fill it in one click.
-
Click Create machine. It stays disabled until the form is complete; any problem shows next to its field as you type. If you changed what the profile filled in, Save as profile keeps it as a new profile.
The dialog then shows each step as it happens. You can close it: the progress stays in the sidebar, and if creation fails the dialog opens again with the error. When it’s done the new machine opens and starts; Windows finishes setting itself up on its own in a few minutes.
The machine page
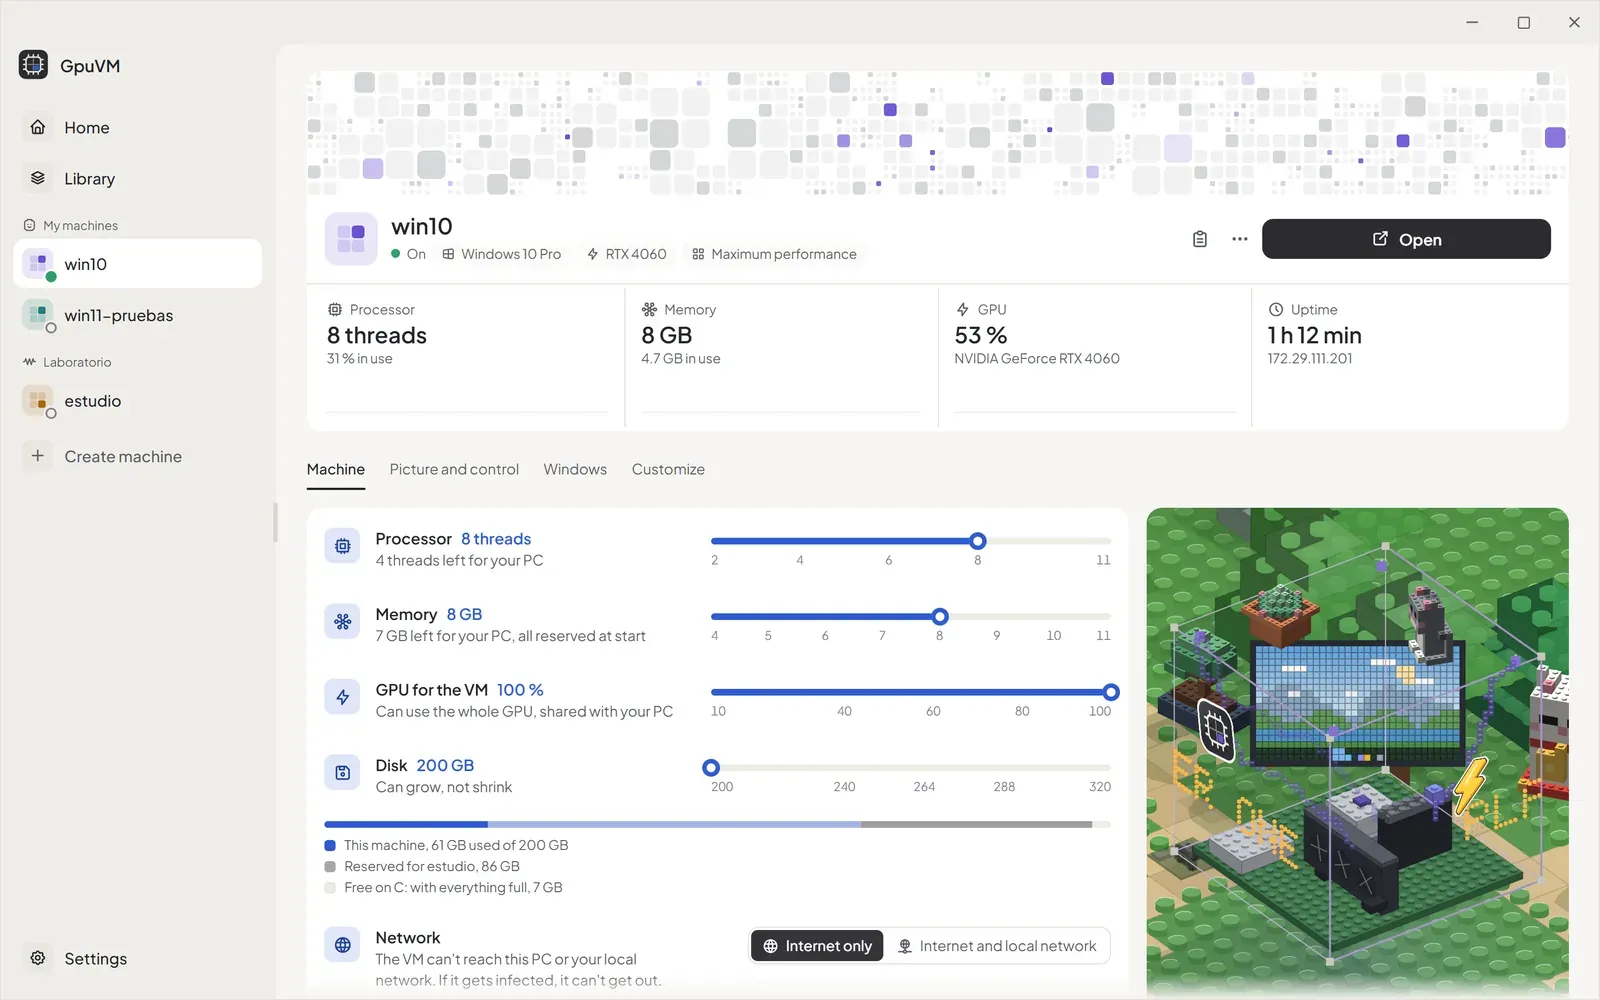
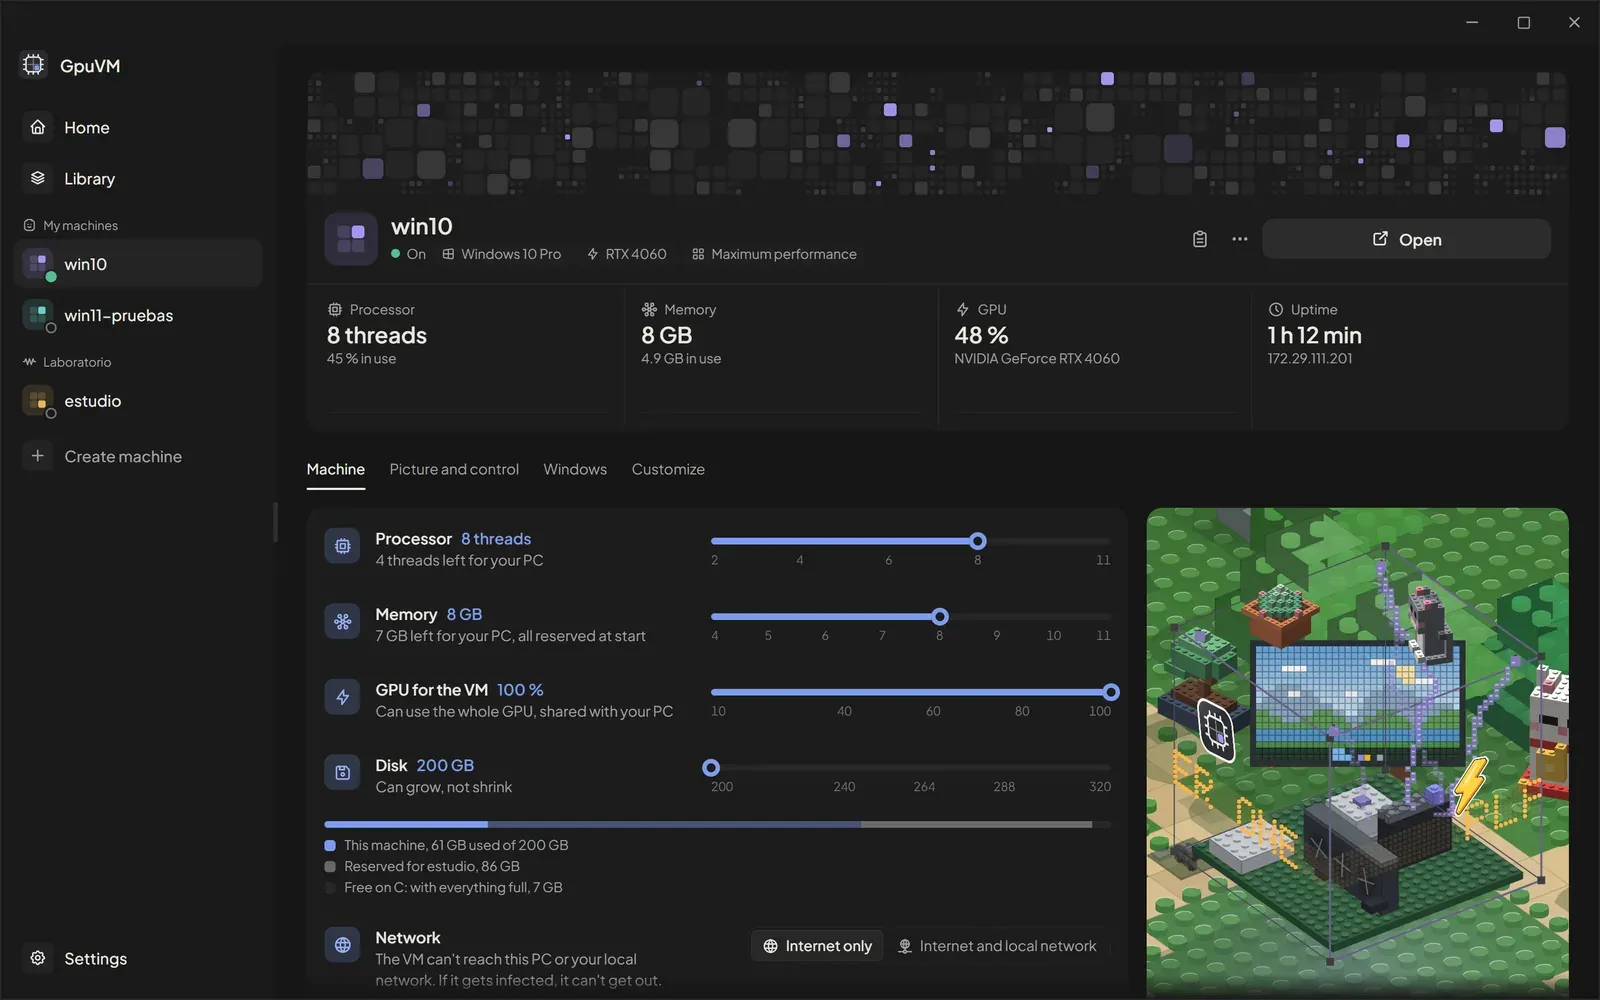
Section titled “The machine page”Click a machine in the sidebar (or View machine on Home) to open its page:
- Header: a banner that moves with the GPU, flickers with the processor and fills with memory; the machine’s icon, name and state; its Windows edition, GPU and profile as small labeled pieces; the clipboard button (Paste in the VM), the ⋯ menu (More options) and the main button (Start and open).
- Usage strip: Processor (threads and % in use), Memory (fixed memory and how much is in use), GPU (% in use while running, or the share assigned while off, and the GPU’s name) and Uptime (and the machine’s IP address), each with a small chart of the last five minutes.
- Sections: Machine, Picture and control, Windows and Customize, on one page. The bar at the top marks the section in view and takes you to the others. Switching to another machine keeps the same section and place.
The cube
Section titled “The cube”Beside the options, always in view, the machine is a hologram inside a glass cube: motherboard, processor (one cell per thread), memory (one module per 4 GB), graphics card (its GPU share as a strip of lights) and disk, the apps floating around and its screen projected above. Lightning reaches each piece as often as it works; what the cleanup keeps out bounces off the glass.
- Drag to turn it any way, scroll to zoom where the mouse is, drag with the wheel pressed to move it, double-click to go back.
- It follows what you change before saving: the camera closes in on the piece you change and then eases back, and a profile that changes several at once runs through them while the hologram rebuilds.
- The other machines of its space are drawn small under it; left alone for a while, the machine floats and joins them.
- Drag the edge of the cube’s panel to make it wider (it never squeezes the options, and it is remembered).
Start and open
Section titled “Start and open”The main button changes with the machine’s state:
| State | Button | What it does |
|---|---|---|
| Off | Start and open | Starts the machine and opens it in Moonlight. |
| On | Open | Opens it in Moonlight. |
| Paused | Resume | Resumes the machine. |
| Off, not enough free memory | Open with N GB / Not enough memory | Opens with the memory that fits / says what is missing. |
| Not created with GpuVM | Start / View console | Starts it / opens the Hyper-V console. |
Start and open leaves everything ready on its own, and the button shows each step while it works:
- If the machine is off and the host’s GPU driver changed, it copies the new driver into it first (avoids a black screen or error code 43).
- Starts the machine and waits for Windows (the first time, Windows finishes its setup) to start and sign in on its own. If Windows is finishing updates, or restarts to finish them, the button says so.
- Returns the Windows session to the GPU display if it was taken somewhere else.
- Sets the machine’s display to the Moonlight resolution and frame rate, and makes Sunshine capture it.
- Installs gamepad support and the administrator prompt watcher the first time.
- Pairs Moonlight with Sunshine if this PC isn’t paired yet.
- Opens Moonlight and waits until the picture shows.
Work that lasts until Windows restarts (the display, the capture mode, the sound) is done once per boot, through one connection to the machine. Opening a machine that is already on takes about 7 to 10 seconds until you see the picture; from off, about a minute, most of it Windows and Sunshine starting. Clicking Open again while Moonlight already shows it brings that Moonlight window to the front. If the machine is off, saved or paused while GpuVM waits for its network address, it says so at once instead of waiting.
Warnings along the way (for example, audio not configured yet) appear as notifications.
Keyboard, mouse and gamepads
Section titled “Keyboard, mouse and gamepads”With Moonlight in fullscreen, Alt+F4, Alt+Tab and the Windows key go to the machine instead of closing Moonlight or taking you back to this PC. To quit the stream, press Ctrl+Alt+Shift+Q. With the mouse For games, Ctrl+Alt+Shift+Z releases it without closing.
Gamepads work too: GpuVM installs the virtual gamepad driver (ViGEmBus) in the machine, and a controller connected to this PC reaches Windows in the machine as an Xbox 360 controller.
From a key, click, mouse move or gamepad button on this PC to the change in Moonlight’s picture takes about 17 ms (median) at 120 FPS or more, about 11 ms more than the same PC without streaming. At 60 FPS it adds one more frame.
Administrator prompts
Section titled “Administrator prompts”With the Fast capture (the default), Windows’ administrator prompts (UAC) inside the machine can’t be streamed: Windows draws them on a separate, protected desktop. GpuVM shows them instead: while one is open, a small card appears over everything, Moonlight included, with the machine, the program asking and its publisher (Unknown publisher when it isn’t signed). Allow and Deny answer it in the machine.
- Only this PC can answer: a program inside the machine can’t approve itself.
- If a different prompt opened in the meantime, nothing is pressed and the card shows the new one.
- It needs the machine’s Windows password.
- With the Classic capture the prompts show in Moonlight as usual and the card doesn’t appear. See Capture modes.
Paste in the VM
Section titled “Paste in the VM”While the machine is running, the clipboard button next to the ⋯ menu, Paste in the VM, copies the text you copied on this PC to the machine’s clipboard, ready for Ctrl+V. It only goes from the PC to the machine: the machine never reads this PC’s clipboard. It needs the Windows password.
Machine
Section titled “Machine”The Machine section, for machines created with GpuVM:
- Processor: threads, from 2 up to the host’s threads minus one; it says how many are left for your PC.
- Memory: GB, from 4 up to the host’s memory minus 4 GB, all reserved when the machine starts.
- GPU for the VM: 10–100 %, in steps of 10.
- Disk: grows the disk (it can’t shrink). A dynamic disk grows as the machine writes, so the slider stops at what fits once every machine’s disk on that drive is full, keeping 20 GB for Windows; the bar below shows this machine’s disk, the room reserved for the others and what would be left. A machine built on a template has the template’s size. Windows’ C: drive grows on its own the next time it opens.
- Network:
- Internet only (the default): the machine reaches neither this PC nor your local network, except for what the stream needs. The rules live on the machine’s virtual switch port, outside it, so an infected machine can’t remove them.
- Internet and local network: the machine reaches this PC and the rest of your network. Use it only when you need it, for example for a NAS.
- Shared disks (when you have one): each disk with what it is for, how full it is and where it is connected. See Shared disks.
Processor, memory, GPU and disk need the machine off: if it’s running the button reads Shut down and apply, which validates, shuts it down, applies and starts it again. If it can’t start again (for example, not enough free memory), the previous settings are restored. Discard drops what you changed.
Picture and control
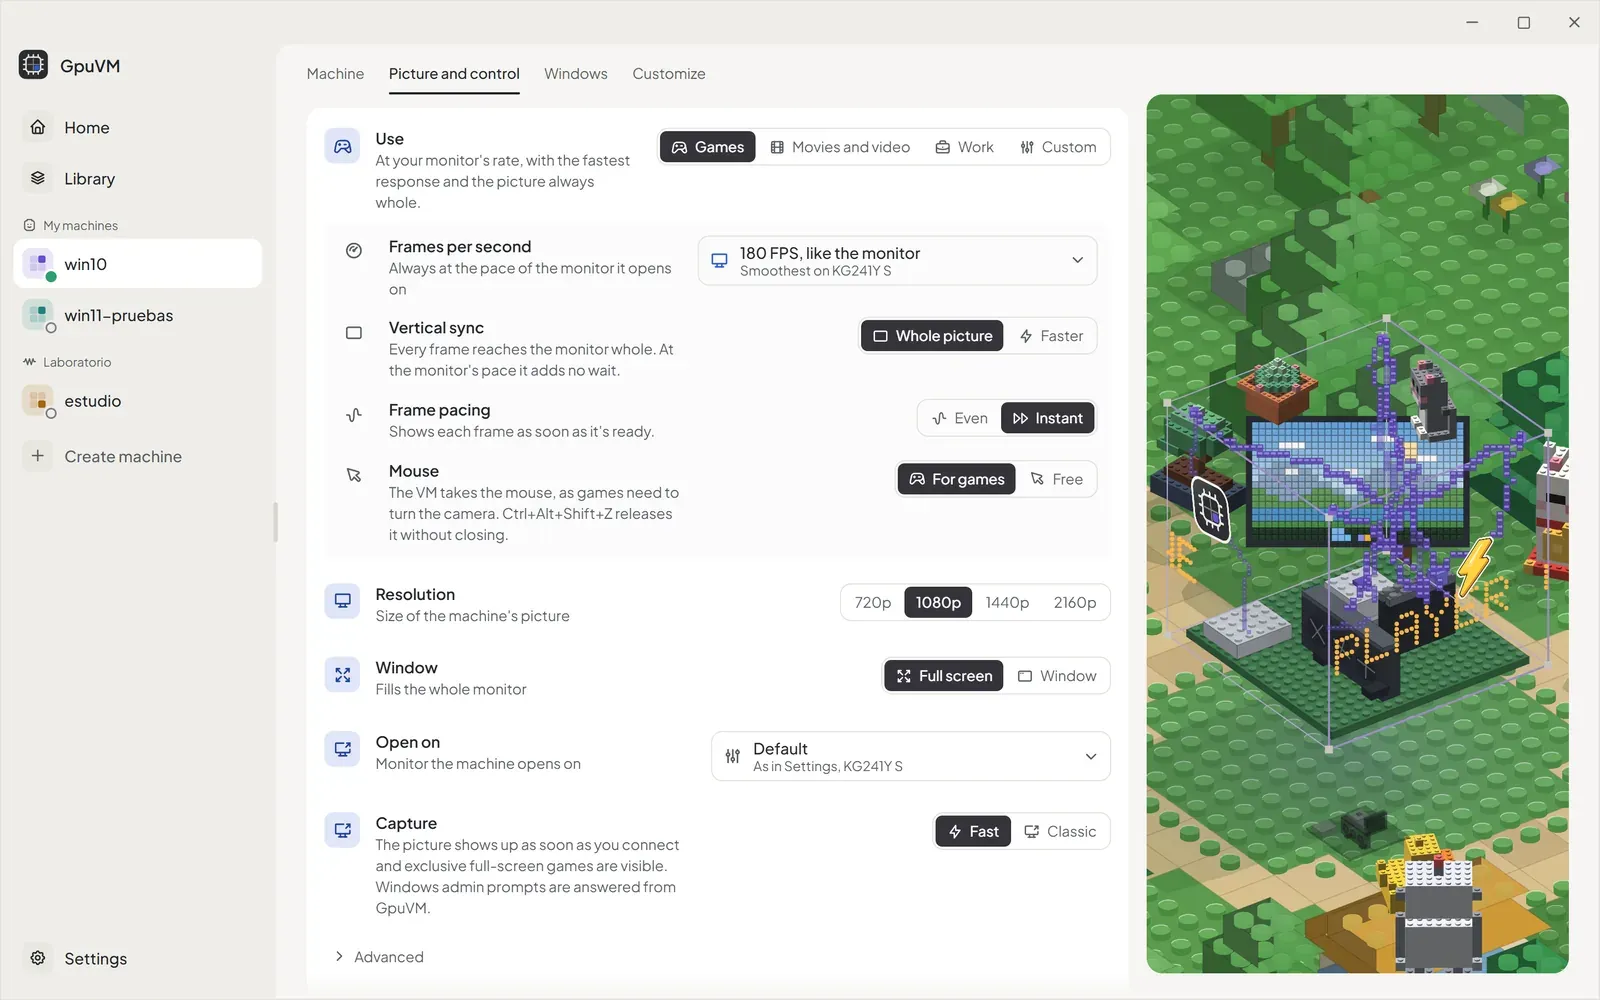
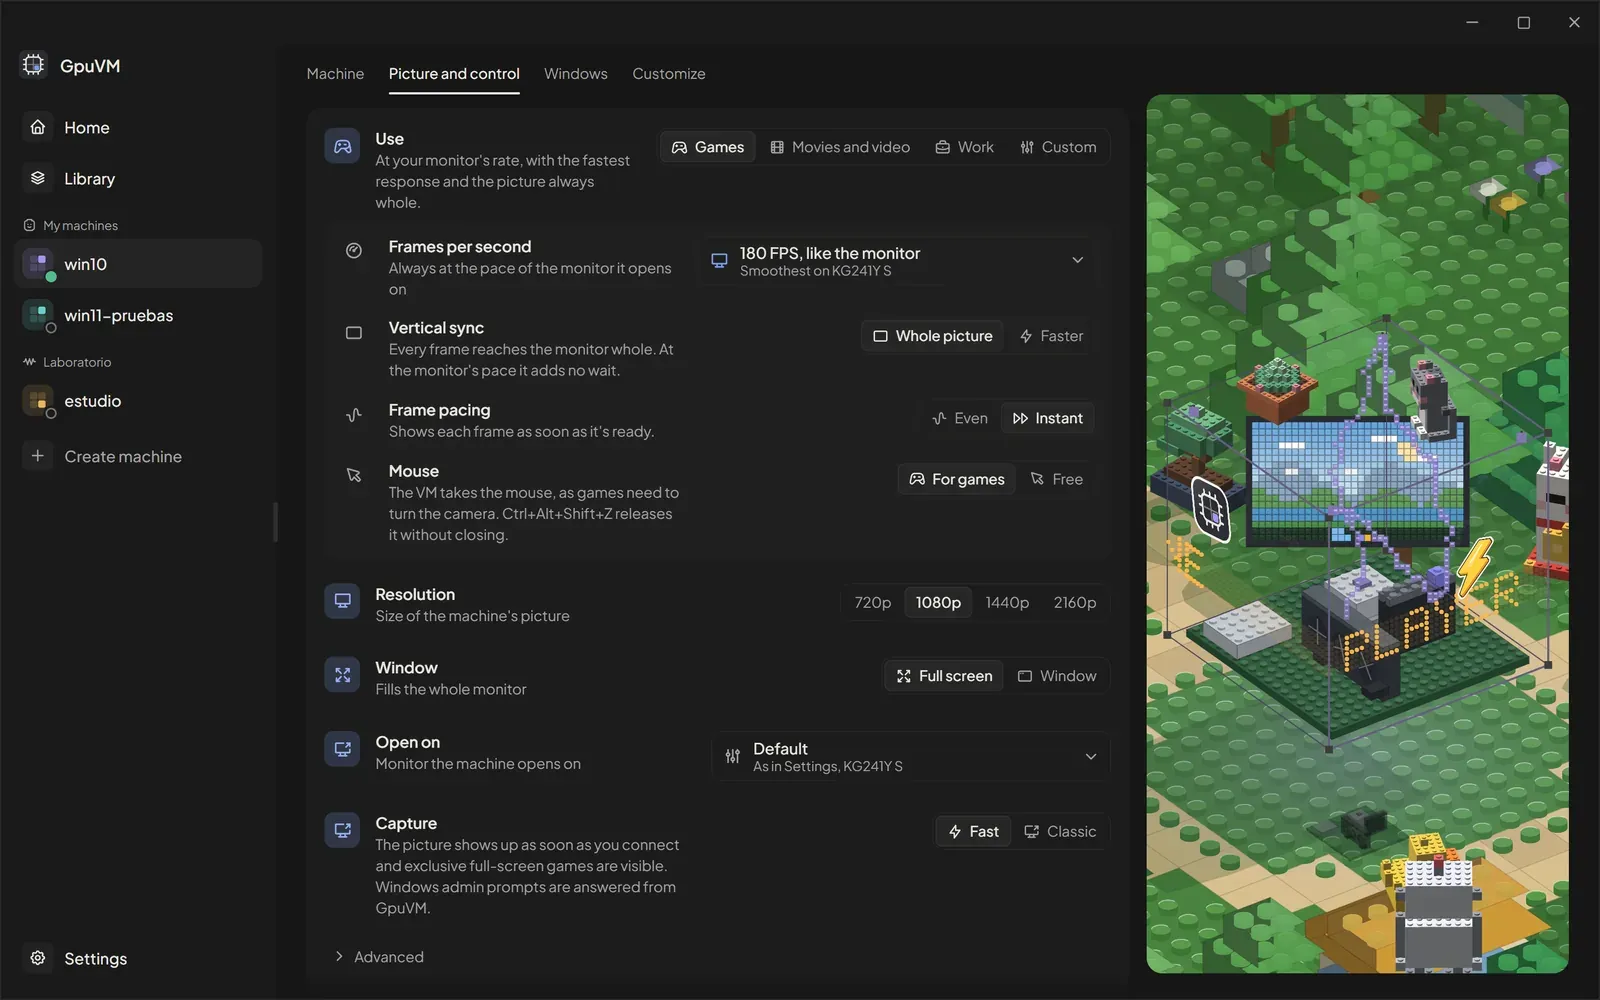
Section titled “Picture and control”How Moonlight shows the machine and how you control it:
-
Use: what the machine is for. It heads its group and sets the four options under it; changing one by hand switches it to Custom.
Use Frames per second Vertical sync Frame pacing Mouse Games Monitor Whole picture Instant For games Movies and video 60 FPS Whole picture Even Free Work Monitor Whole picture Instant Free - Frames per second: offered for the monitor the machine opens on: its own rate (Monitor, read every time it opens; GpuVM adds that rate to the machine’s virtual display when it lacks it), the rates that keep even with it, the ones that may stutter, and a custom value from 10 to 480. At the monitor’s own rate V-Sync adds no latency.
- Vertical sync: Whole picture shows every frame complete on the monitor; Faster shows each frame as soon as it arrives, even if the monitor is halfway through drawing the previous one (tearing).
- Frame pacing: Even spreads the frames at a steady rhythm, best at 60 FPS; Instant shows each frame as soon as it’s ready. Only with the whole picture.
- Mouse: For games (the machine takes the mouse, as games need to turn the camera) or Free (the pointer moves in and out of the window as in remote desktop; most games don’t work with it).
-
Resolution: 720p, 1080p, 1440p or 2160p.
-
Window: Full screen, or Window (a window you can move, the size of the resolution).
-
Open on (with more than one monitor): As in Settings follows the choice in Settings; Windows’ main monitor, whichever it is at the time; or a monitor by its name. A chosen monitor that isn’t connected falls back to the main one.
-
Capture: how Sunshine captures the screen.
- Fast (the default): the picture shows about 2.6 s after connecting, and games in exclusive full screen show too. Windows’ administrator prompts are answered from GpuVM (Administrator prompts).
- Classic: administrator prompts show in Moonlight, but the picture can stay black for a while after connecting and games in exclusive full screen look black. See Streaming.
-
Advanced (click to show):
- Codec: Automatic (Moonlight picks the best one this PC can show), H.264, HEVC or AV1. If the picture doesn’t show, go back to Automatic.
- Picture quality: the bitrate in Mbps, up to 150. Higher uses more network; at the minimum (Automatic), Moonlight picks it from the resolution and frame rate.
These are saved without stopping the machine: Moonlight’s settings apply the next time you open it, the capture right away if the machine is running (it restarts Sunshine), and the network right away.
Windows
Section titled “Windows”Windows cleanup
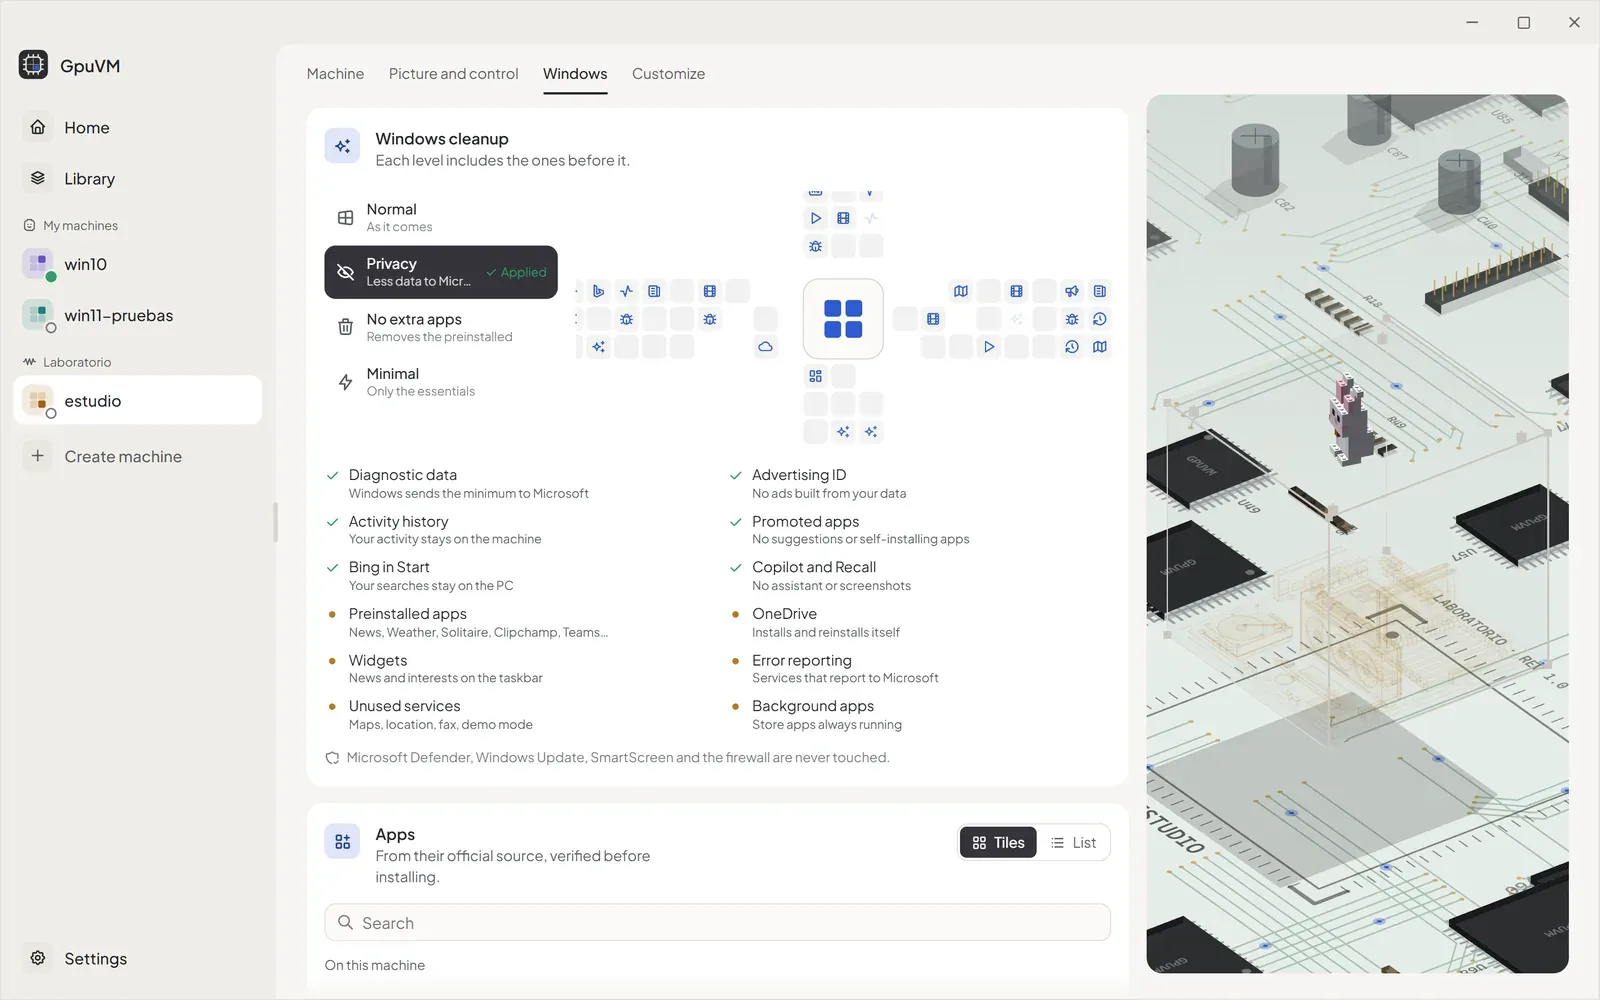
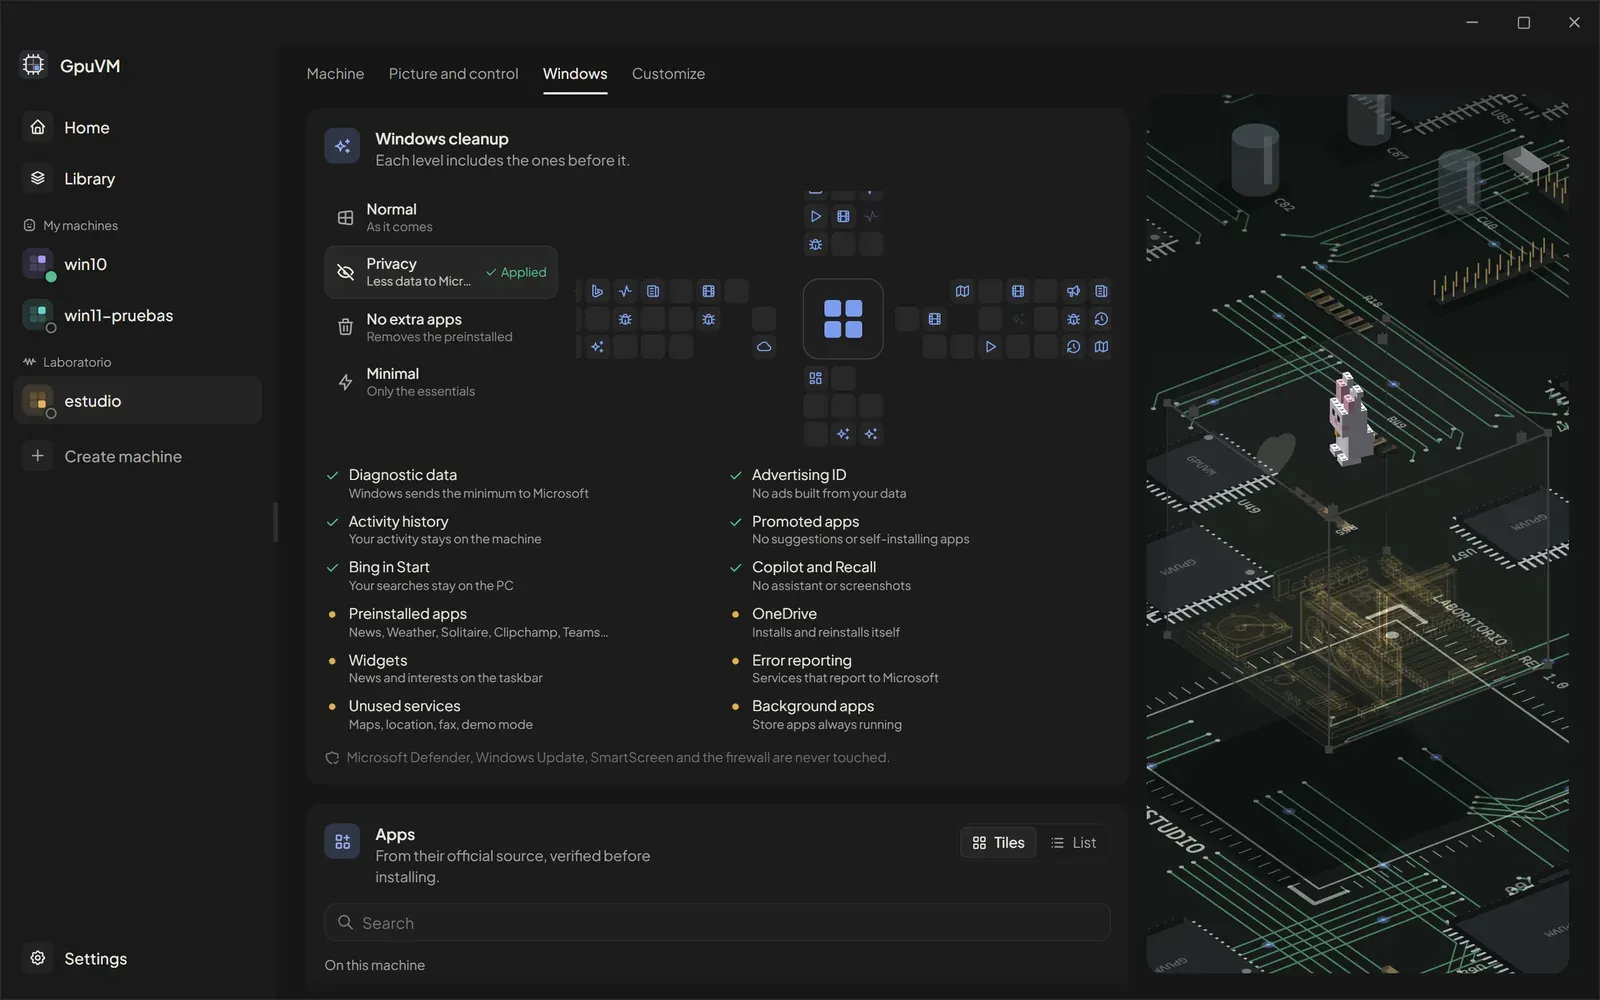
Section titled “Windows cleanup”How clean Windows is inside the machine. Each level includes the previous ones:
- Normal: Windows as it comes.
- Privacy: diagnostic data at the minimum the edition allows (on Pro, Windows doesn’t go below “Required”), no advertising ID, activity history, suggestions, Spotlight, Bing in Start, Copilot or Recall.
- No extra apps: also removes preinstalled apps (News, Weather, Solitaire, Clipchamp, personal Teams, the new Outlook…), also for new users, plus OneDrive and widgets. They can be installed again from Microsoft Store.
- Minimal: also turns off the telemetry and error reporting services and services a machine doesn’t use (maps, location, fax, demo mode), and keeps Store apps from running in the background.
Next to the levels, a list of everything Windows comes with (tracking, ads, Bing, Copilot, preinstalled apps, OneDrive, widgets, background services) says what each one does now or, when the chosen level removes it, how Windows ends up without it, beside a scene where those pieces stop reaching Windows. Choose a level and click Apply, or Start and apply if the machine is off. A lower level undoes the settings of the higher ones. Microsoft Defender, Windows Update, SmartScreen, UAC, the firewall, Microsoft Store and Xbox are never touched. The level can also be chosen when creating the machine or in a profile; it is applied on Windows’ first sign-in.
Game launchers (Steam, Epic Games, Battle.net, EA app, GOG Galaxy, Ubisoft Connect), browsers (Chrome, Brave, Firefox), media (VLC, OBS Studio, Spotify), Discord, 7-Zip, WinRAR and Proton VPN, installed in the machine:
- The catalog sits on the left by category, as Tiles (pick several, then Install in the bar that counts them) or as a List (Install per app); the choice is remembered. Installed apps are marked. Start and install starts the machine first.
- On the right, the search and On this machine: the apps already installed, each with a menu (or right-click) for Reinstall and Uninstall. Uninstalling runs the app’s own uninstaller and asks first; Battle.net’s opens in the machine’s window to finish there.
Each installer is downloaded inside the machine from its official source and only runs if Windows confirms it is signed by its publisher; pinned versions are also checked by SHA-256. Apps can also be picked when creating the machine; they are installed the first time it opens. The list of installed apps is checked each time the page opens with the machine running, and remembered while it is off. It needs the Windows password.
Customize
Section titled “Customize”Decorates the machine’s cube; each machine keeps its decoration, also when renamed, and it shows on Home too.
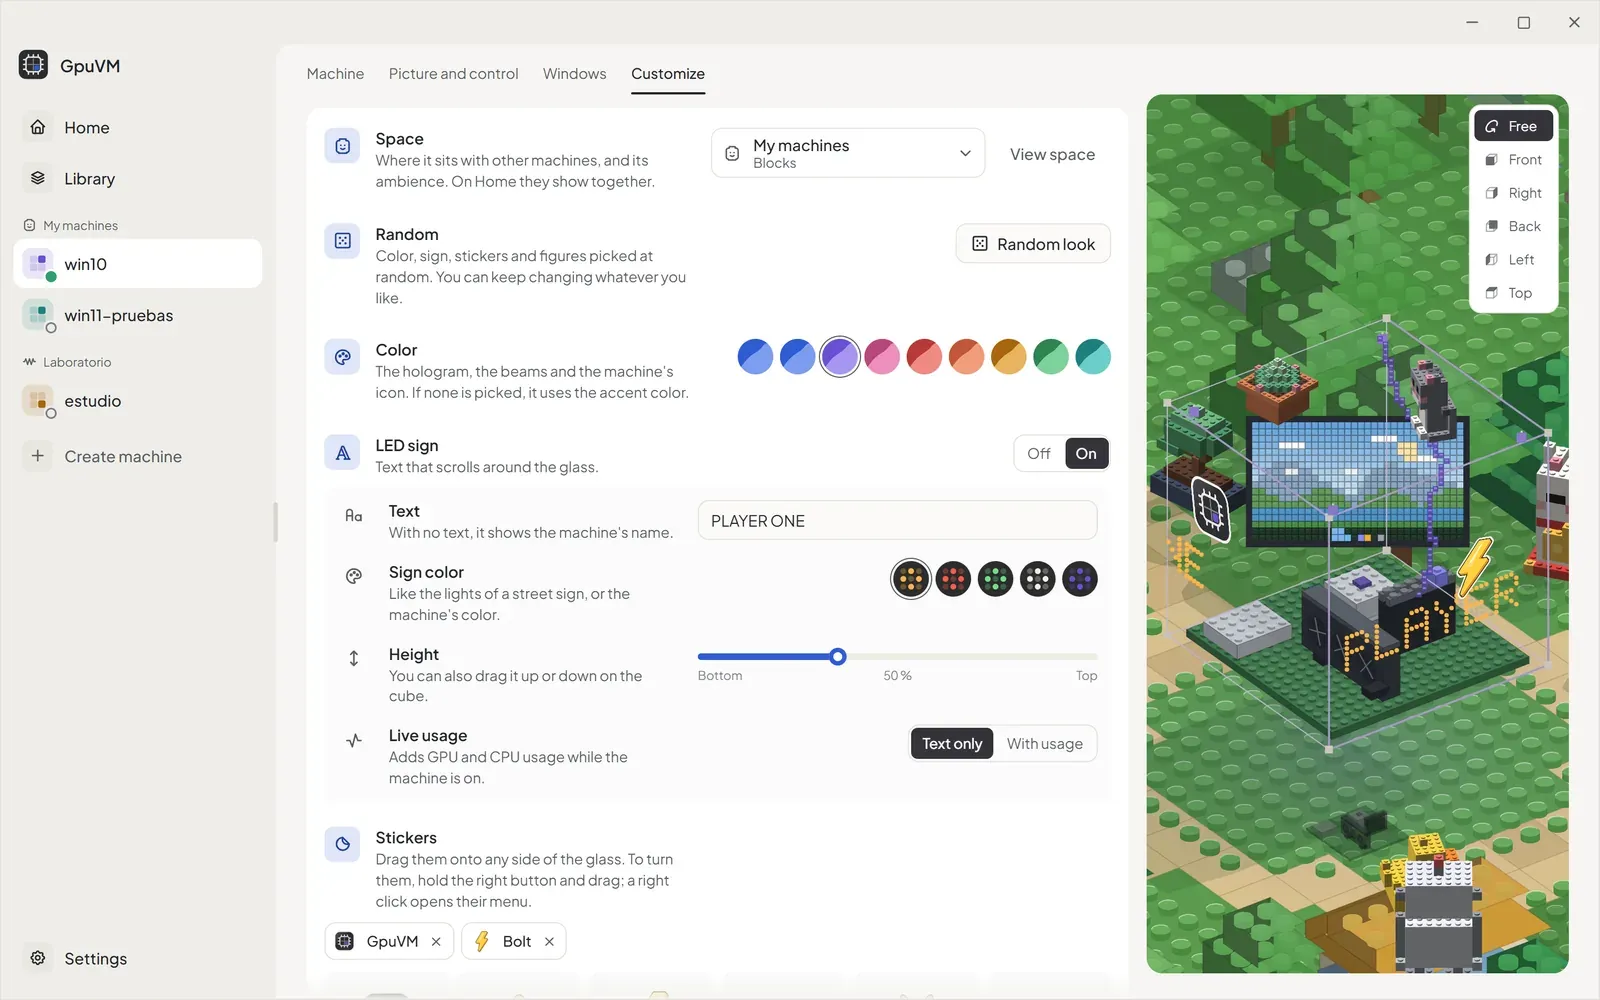
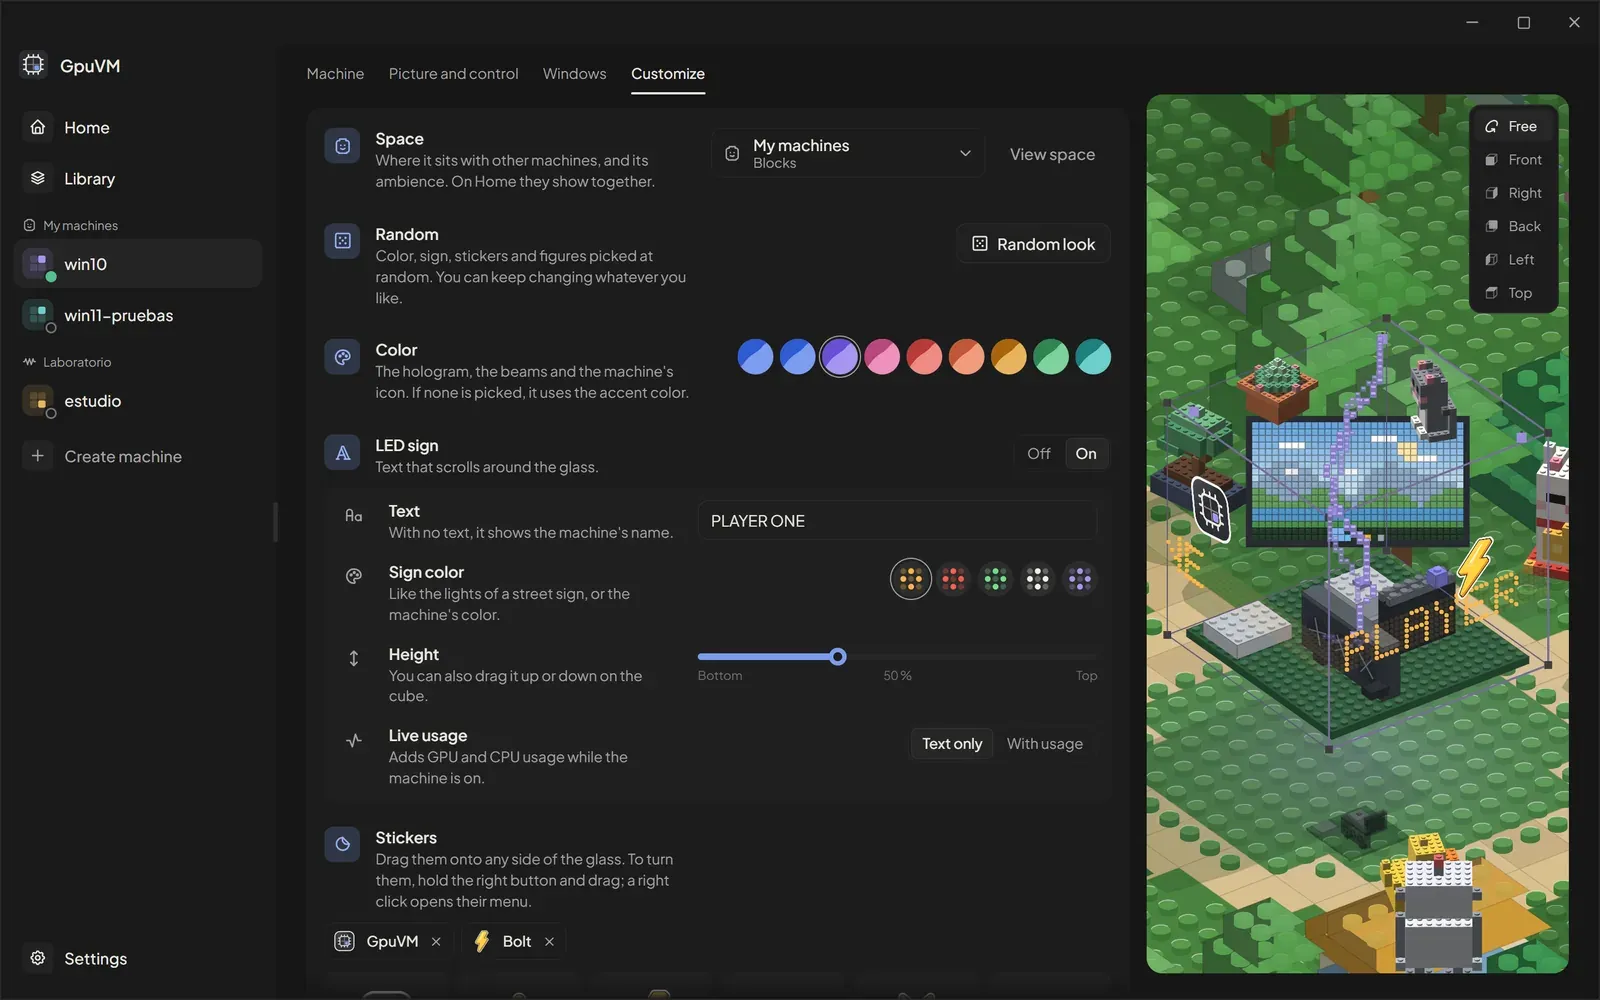
- Space: the space the machine is in (choosing another moves it there, or New space creates one with it), and View space to see it on Home.
- Random: Random look picks a color, sign, stickers and figures in one click; keep changing whatever you like.
- Color: the hologram, the lightning and the machine’s icon. With none picked, it uses the accent color.
- LED sign: text that runs around the glass (Off / On). Text (empty shows the machine’s name), Sign color (amber, red, green, white or the machine’s color), Height (also by dragging it up or down on the cube) and Live usage: Text only or With usage (GPU and processor use while it runs).
- Stickers: GpuVM, star, bolt, heart, cat, dog, spider, ghost, rocket, fire, diamond, moon, controller, or Upload image for one of your own (PNG, WEBP, JPG or GIF, up to 8 MB). Drag them onto any side of the glass.
- Figures: toy-brick figures that stand on top of the cube (lucky cat, plant, duckling, robot, cactus, mushrooms, controller, mug, penguin, rocket, bonsai, dog, cat, spider, magic cube, bunny, bear, unicorn, tiger, fawn).
On the cube, while this section is in view:
- Dragging shows the face’s cells lit in the accent and things snap to them. Hold the right button and drag sideways to turn a sticker or figure (it settles every 15°); a right-click opens its menu (turn, size, duplicate, copy, cut, paste, remove).
- Pick several with Shift or Ctrl and click, a box drawn with Shift on empty space, or Ctrl+A; they move, turn, duplicate (Ctrl+D) and are removed (Delete) together, and the arrows move them one cell at a time. What is picked shows under a soft layer of the accent.
- Ctrl+C, Ctrl+X and Ctrl+V copy, cut and paste stickers and figures, also from one machine to another.
- A panel on the cube shows it Free or from the Front, Right, Back, Left or Top, and keeps it still there.
Windows password
Section titled “Windows password”If GpuVM doesn’t have the machine’s Windows password (for example, after rebuilding its state with repair), the page shows a card asking for it, for the machine’s user. It is saved encrypted with DPAPI and lets GpuVM fix things inside the machine through PowerShell Direct (without network and without asking you): waiting for setup to finish, moving the session back to the GPU display, setting the display resolution, installing gamepad support and answering administrator prompts. Machines created from the app already have it.
Driver notice
Section titled “Driver notice”If the machine’s NVIDIA driver differs from the host’s, a notice says so. It updates on its own the next time you start the machine from the app, or right away with Update now or Shut down and update.
More options
Section titled “More options”The ⋯ menu has:
- Start without opening.
- Shut down (orderly; when Windows has updates waiting it installs them first, which can take a few minutes, and the button says so), Force shutdown (click twice to confirm; unsaved work is lost), Restart, Pause / Resume.
- View Hyper-V console. It only shows the basic Hyper-V display, not what the GPU draws.
- Pair Moonlight again.
- Update GPU driver, or Shut down and update driver if it’s running.
- Create template, or Shut down and create template if it’s running: saves this machine’s Windows as a template. The machine stays as it is.
- Rename (when it’s off): the new name is checked as you type while the cube engraves it on the board’s serial plate. The machine is renamed in Hyper-V with its folder and disk; its settings, Moonlight pairing, shared disks and decoration stay with it. If a step fails, what was already renamed is undone.
- Another icon (also by clicking the icon next to the name) and Another banner (three to switch between).
- Delete machine: removes it from Hyper-V, with Keep the disk or Delete the disk too, after a UAC confirmation. It can’t be undone.
Library
Section titled “Library”The Library is one page with all its sections, and a bar at the top that marks the one in view. Above them, GpuVM’s space on the drive: how much the machine disks, templates, shared disks and ISOs take, each in its color, and how much is free.
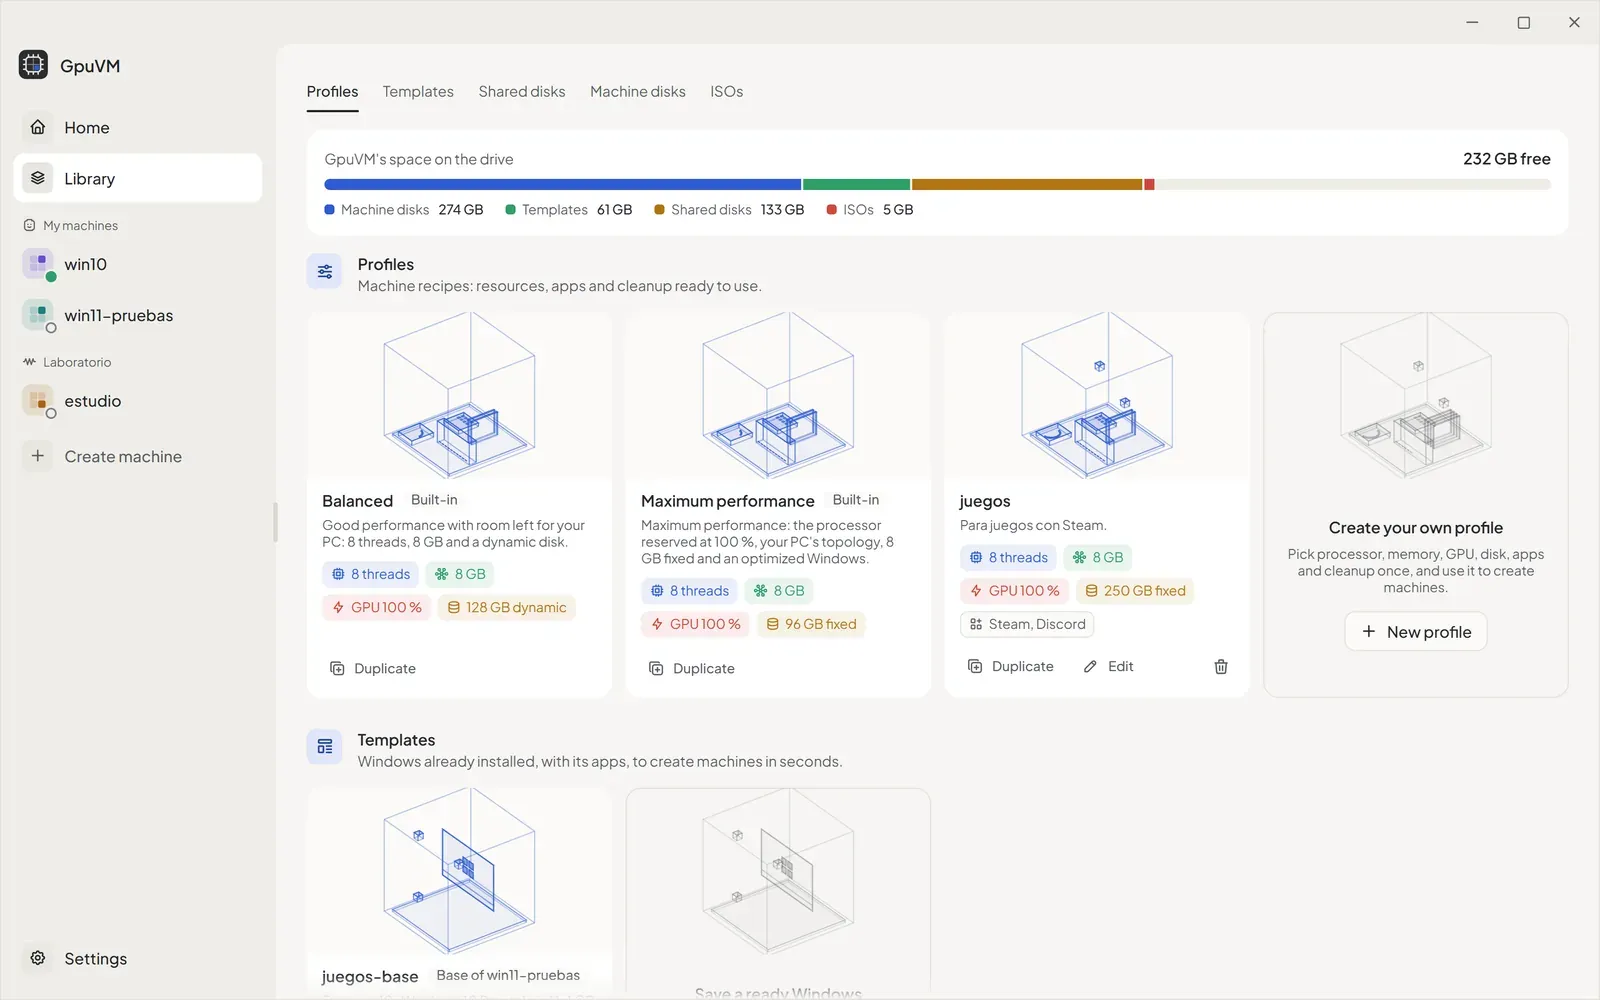
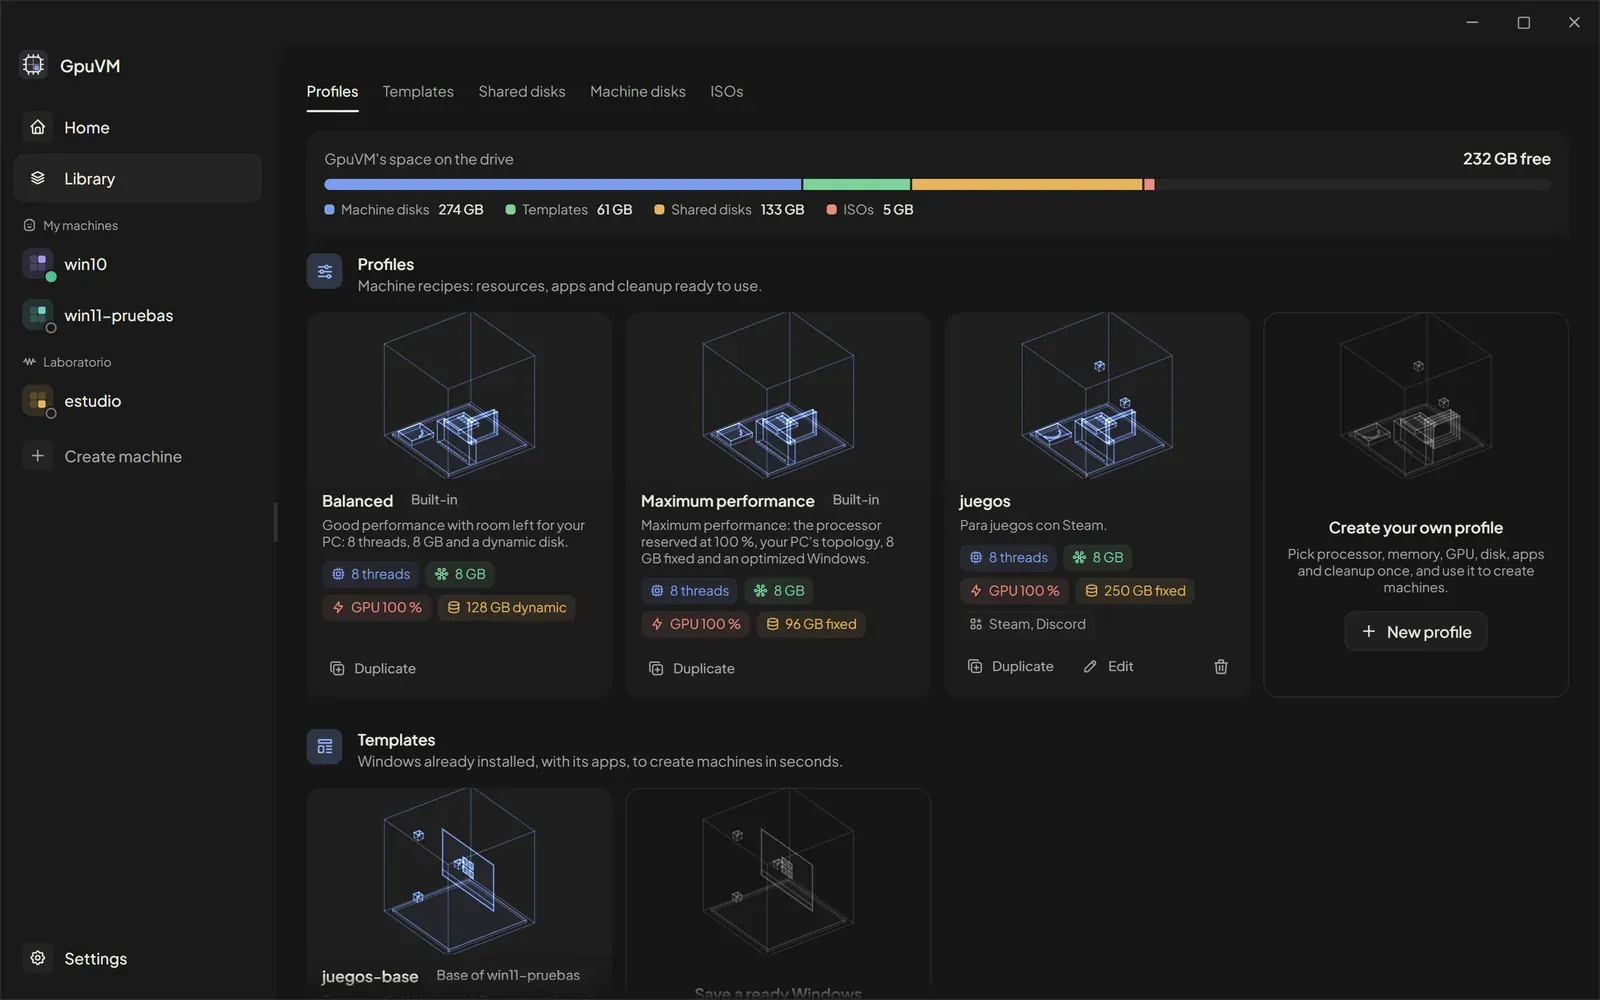
- Profiles: the built-in profiles (marked Built-in) and your own, as cards with a small cube of what they give. Duplicate starts one from another; yours can also be edited (Edit, with the machine it makes beside the form) and deleted. The last card, New profile, creates one. Each keeps processor, memory, GPU share, disk size and type (Fixed / Dynamic), Windows image, apps to install, cleanup, the use and how Moonlight opens (resolution, frame rate, full screen or window), on top of the built-in profile it is Based on. See Profiles.
- Templates: see Templates.
- Shared disks: see Shared disks.
- Machine disks: each machine’s disk and the ones left without a machine (In use or Free). Create a machine with this disk creates a machine again from a disk kept when its machine was deleted, with Windows and its apps as they were; free disks can be deleted (click again to confirm, then a UAC prompt; it can’t be undone). Each Prepared Windows is Windows applied once from an ISO and edition (about 12 GB): new machines with that Windows are created by copying it, in about a minute. Deleting it frees that space; the next machine with that Windows prepares it again.
- ISOs: the Windows images you used, with the machines that used them, plus the ones in Downloads and Desktop. Add ISO or Add to list remembers one, and Remove from list forgets it without deleting the file. Remembered ISOs are offered first when creating a machine.
An empty section shows the card to add the first one.
Templates
Section titled “Templates”A template is a machine’s Windows saved as a read-only base disk, with its apps, cleanup level and password. Create one from a machine’s ⋯ menu (Create template), or with New template in the Library, picking the machine whose Windows it saves and naming it. A machine created From template gets a disk on top of it that only stores what changes, so it is ready in seconds and takes a few GB. Each copy gets its own streaming identity (Moonlight pairs with it as a new host) and its own computer name. Its disk has the template’s size and can’t be enlarged.
Each template card shows the machine it came from, its size and the machines built on it, and creates a machine from it. A template can only be deleted when no machine is built on it.
Shared disks
Section titled “Shared disks”A shared disk keeps your games or files apart from Windows and moves between machines, so a new machine doesn’t download everything again. New disk asks for a name, a use (Games or General) and a maximum size; it only takes on the PC what you store on it.
- Connect it from the machine’s Machine section: Connect, also while the machine runs. Inside, it gets a drive letter. A Games disk gets
SteamLibrary, added to Steam’s libraries (GpuVM closes Steam, adds it and opens it again; if a game keeps Steam open, it says so). Disconnect closes it inside Windows first; if a program is using it, it tells you instead. A disk attached to another machine that is off can be moved with Bring from. - Import folder copies a folder of this PC into the disk, with its progress on the button. A Steam library brings only its games (
steamapps). It works while the disk isn’t attached to a running machine. GpuVM’s own folders, Windows and folders that contain them (such as a drive or the Users folder) can’t be imported.
Settings
Section titled “Settings”Settings, at the foot of the sidebar, has its sections on the left, their options in the middle and a live preview of the theme and accent on the right.
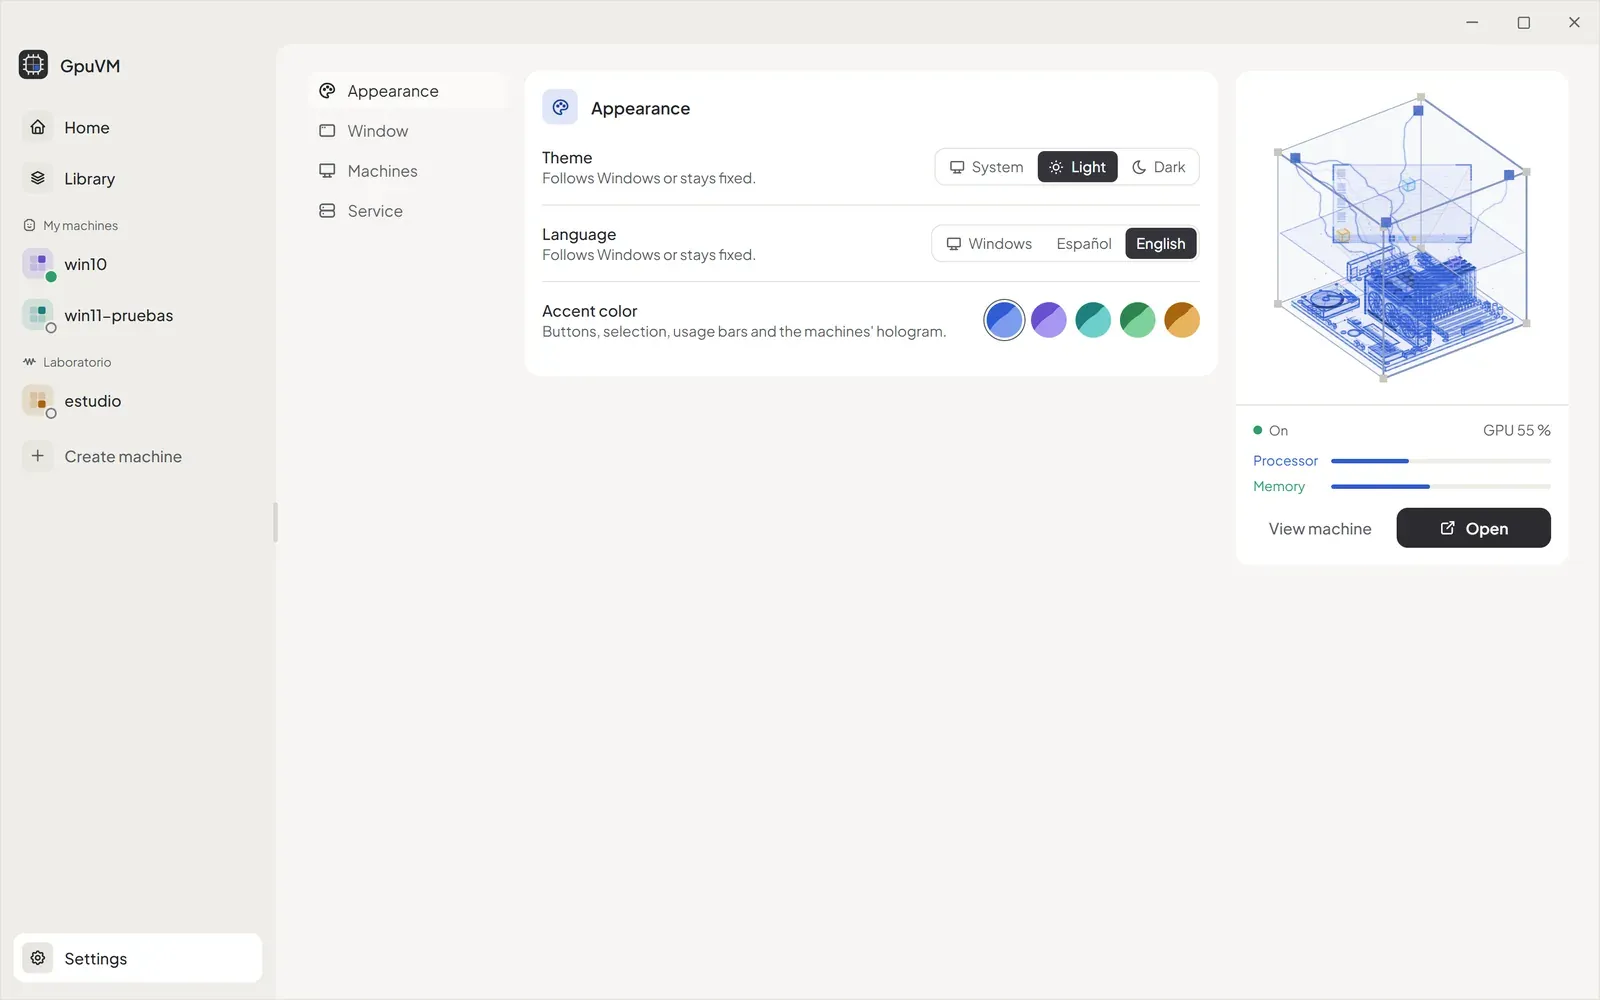
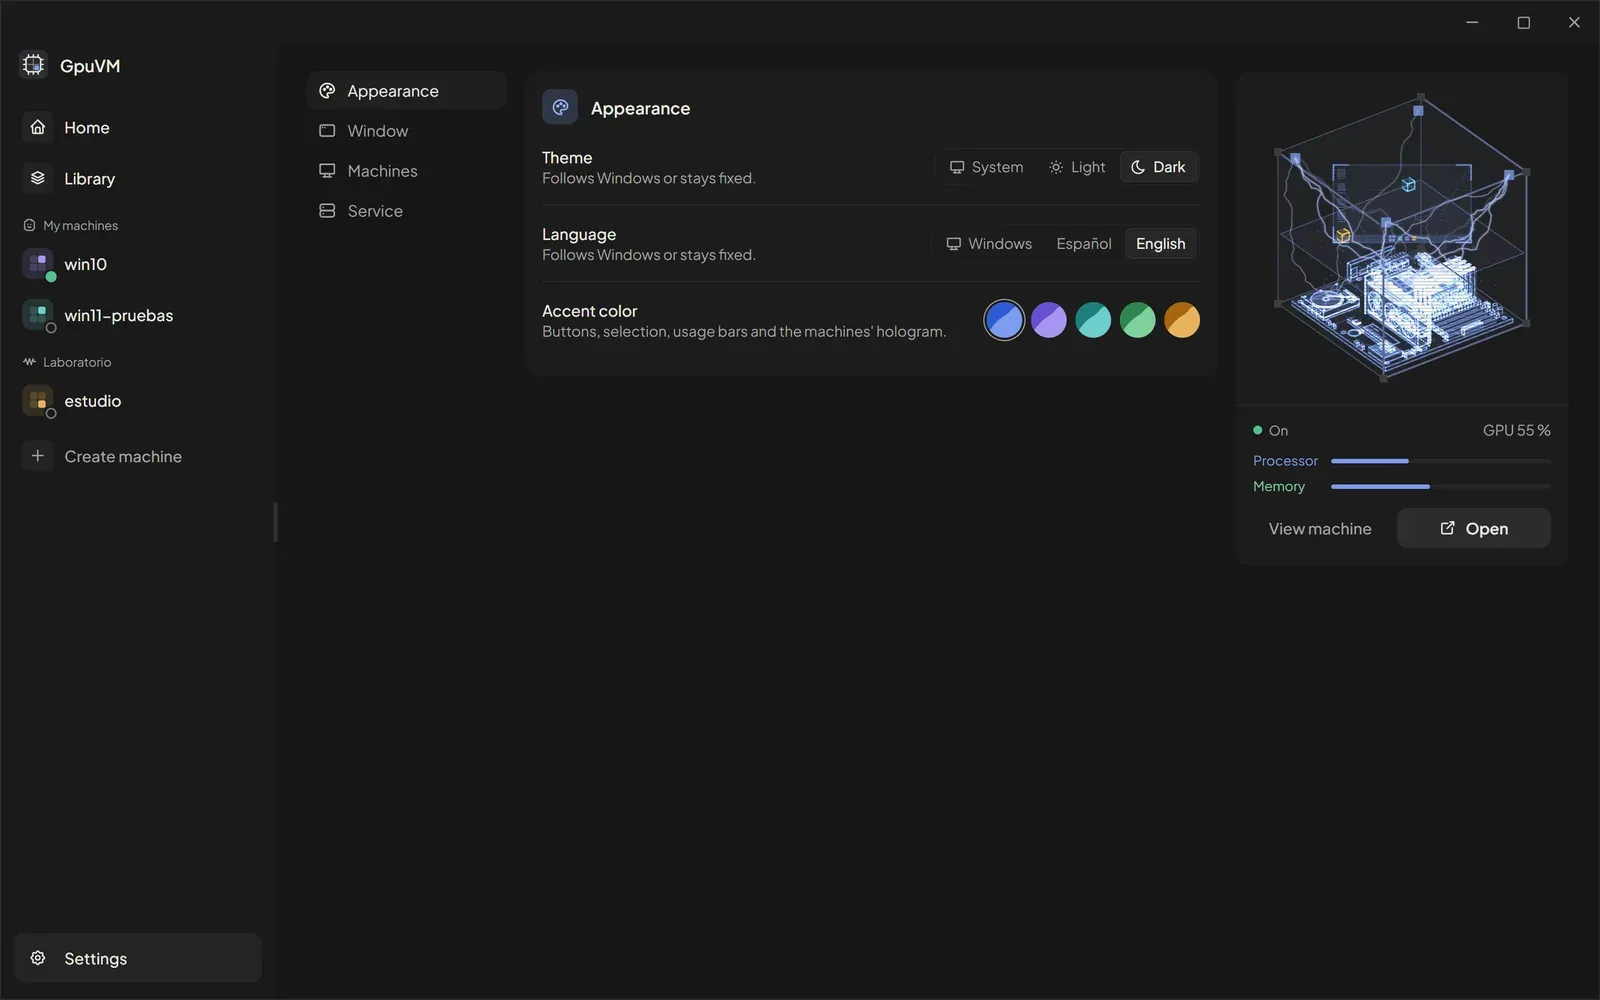
- Appearance:
- Theme: System (the default: follows Windows), Light or Dark.
- Language: Windows (the default: Spanish when Windows is in Spanish, English otherwise), Español or English. Every screen, the tray menu and what GpuVM reports (steps, warnings and errors) switch at once.
- Accent color: blue, violet, teal, green or amber, each shown half light, half dark. It colors buttons, selection, usage bars, the logo and the machines’ hologram.
- Window:
- When closing the window: Quit completely (the default) or Stay in the tray: closing the window hides it and GpuVM keeps running next to the clock, so jobs in progress continue. The tray icon’s menu has Open GpuVM and Quit; a left click on it opens the window again.
- When quitting GpuVM: Leave them on (the default) or Shut them down: quitting shuts down every running GpuVM machine cleanly, like the Start menu inside Windows, and frees its memory. GpuVM closes at once; the shutdown continues in the background.
- Machines (with more than one monitor): Open machines on Windows’ main monitor (the default) or a monitor by its name. Each machine can have its own in its options. Moonlight has no setting for this, so GpuVM moves Moonlight’s window to that monitor as it opens.
- Service, the Windows service that does the Hyper-V work for the app:
- With GpuVM (the default): it starts when GpuVM opens and stops when it quits, once what it was doing is finished (shutting the machines down, a machine being created).
- With Windows: it starts with Windows.
- Manual: it only starts and stops with the Start and Stop buttons here.
- Switching to or from With Windows asks for a UAC confirmation, because it changes the service’s settings in Windows. Starting and stopping it doesn’t. Status shows its state.
GpuVM runs as a single instance: opening it again (for example from the Start menu while it’s in the tray) shows the window that is already open.